Материнская плата Biostar H61MGC LGA1155, часть 2
Часть 1 - Часть 2
Приступаем к работе, и первым делом нам надо заглянуть в BIOS. Сперва быстро мелькает красивая заставка, которую я не успеваю сфотографировать, потом появляется первоначальный экран и нам надо нажимать на кнопку Del. Здесь мы имеем старый привычный БИОС, не самый древний, конечно, но который нынче почти ушел в прошлое...
+ Щелкайте по фото, чтобы увеличить!
Красивых картинок UEFI нет. Мышка не работает. Есть выбор языка, но его нет - все только по-английски. Но эта простота даже приятна.
BIOS матплаты Biostar H61MGC
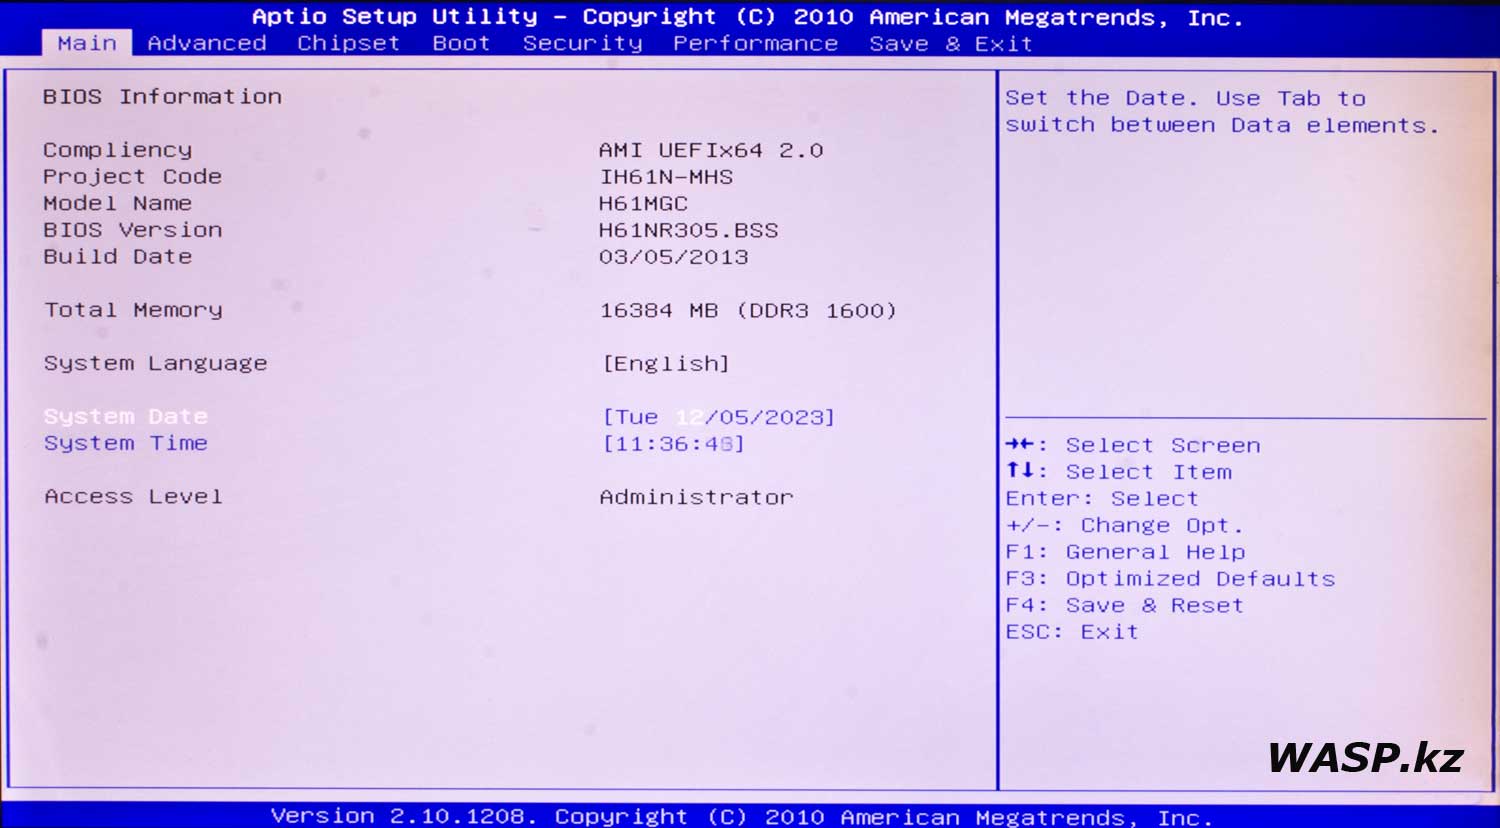
Main - как обычно это первая вкладка. Здесь информация. БИОС у нас AMI - American Megatrends. Inc. Версия 2.10.1208. На экране мы видим такую информацию о БИОСе: соответствие AMI UEFIх64 2.0. Код проекта IH61N-MHS. Модель матплаты H61MGC. Версия прошивки БИОС - H61NR305.BSS от 03/05/2013 - это последняя выпущенная версия прошивки. Далее идет информация об оперативной памяти - 16384 MB (DDR3 1600). Язык системы - Английский. Здесь можно изменить дату и время.
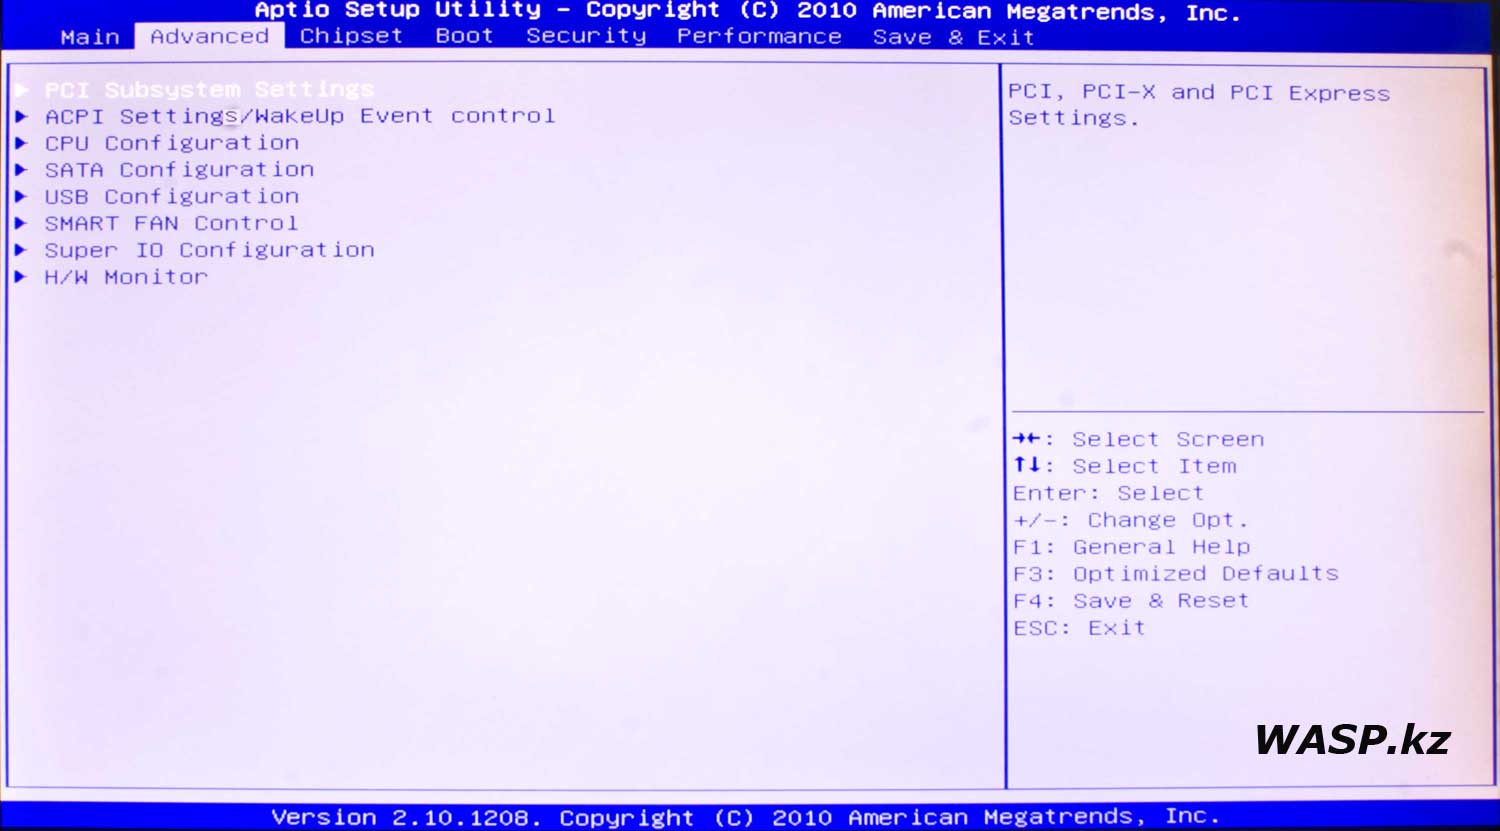
Advanced - вторая вкладка, и здесь восемь пунктов, которые имеют свои настройки, рассмотрим их ближе.
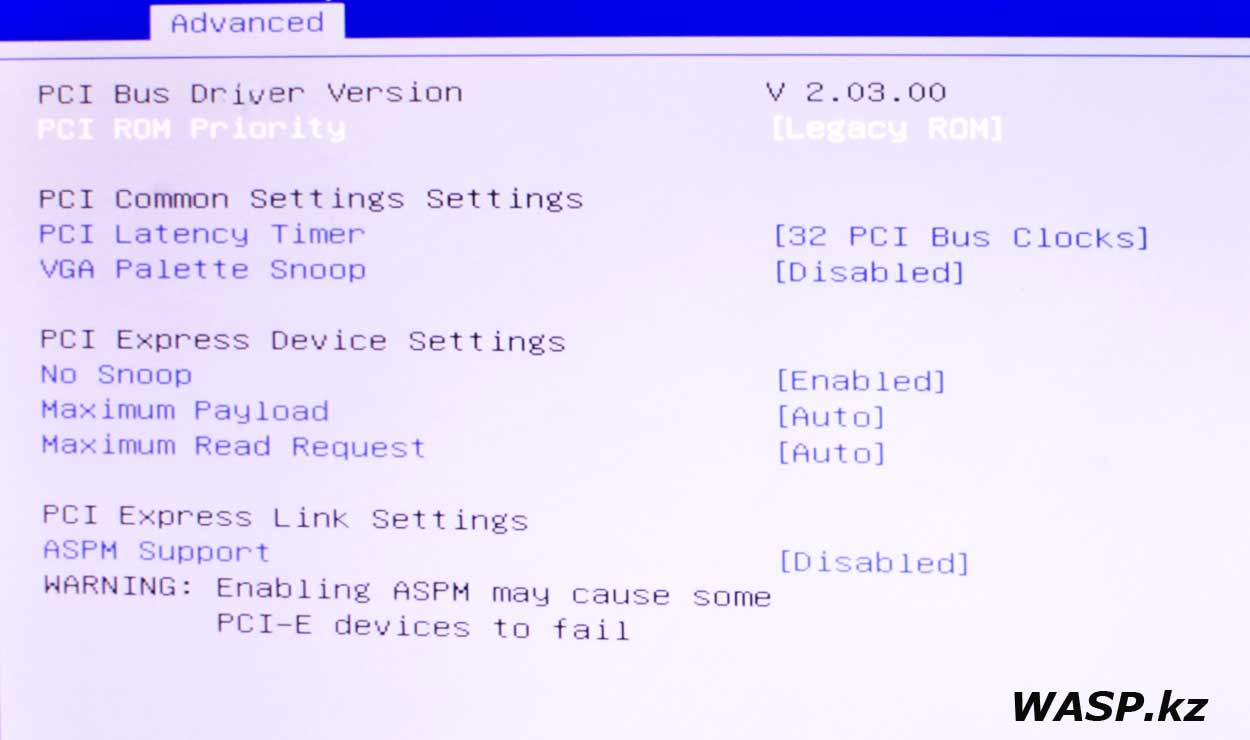
PCI Subsystem Settings - здесь параметры настроек подсистемы PCI, если здесь ничего не понимаете - лучше не трогайте ничего. Значения по умолчанию работают отлично.
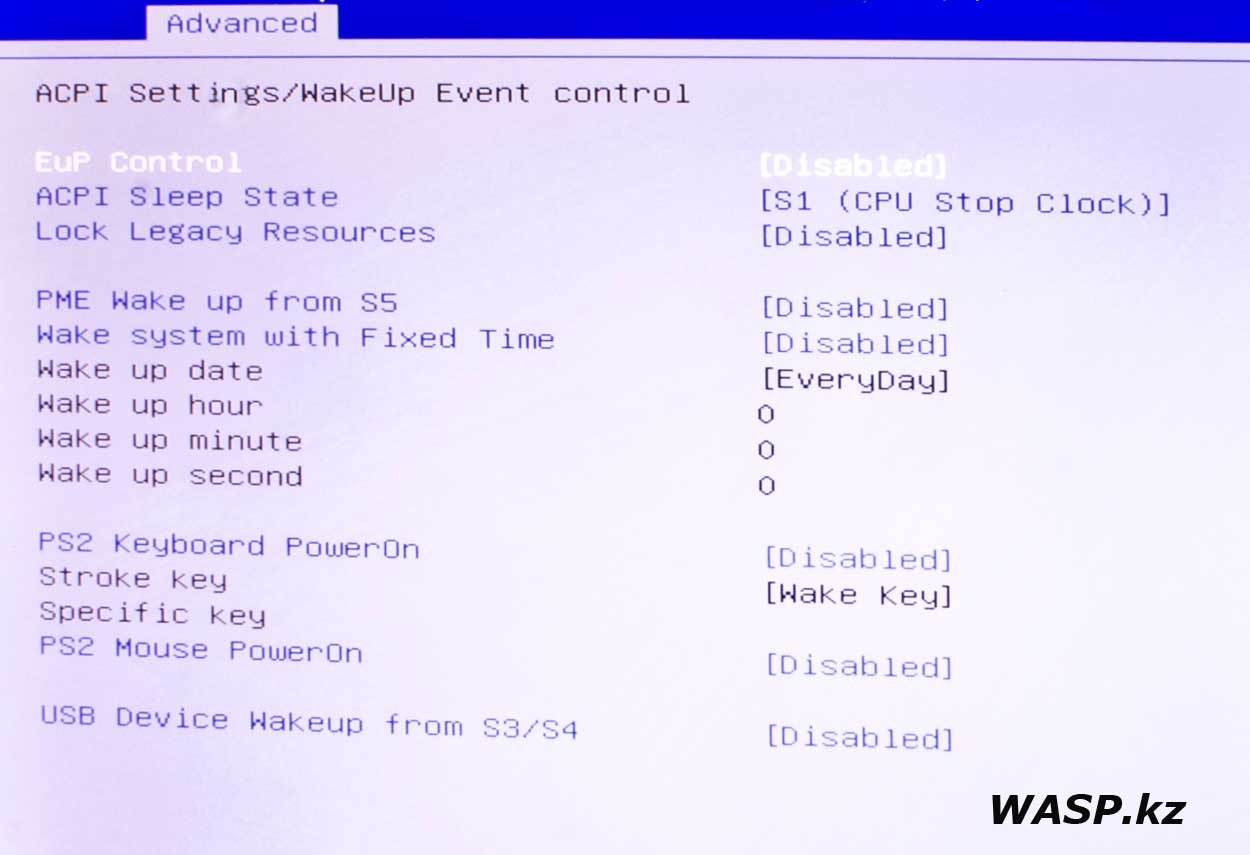
ACPI Settings / WakeUp Event Control - распределение и настройка питания, включения выключения... Так же, ничего трогать и менять без нужды не стоит.
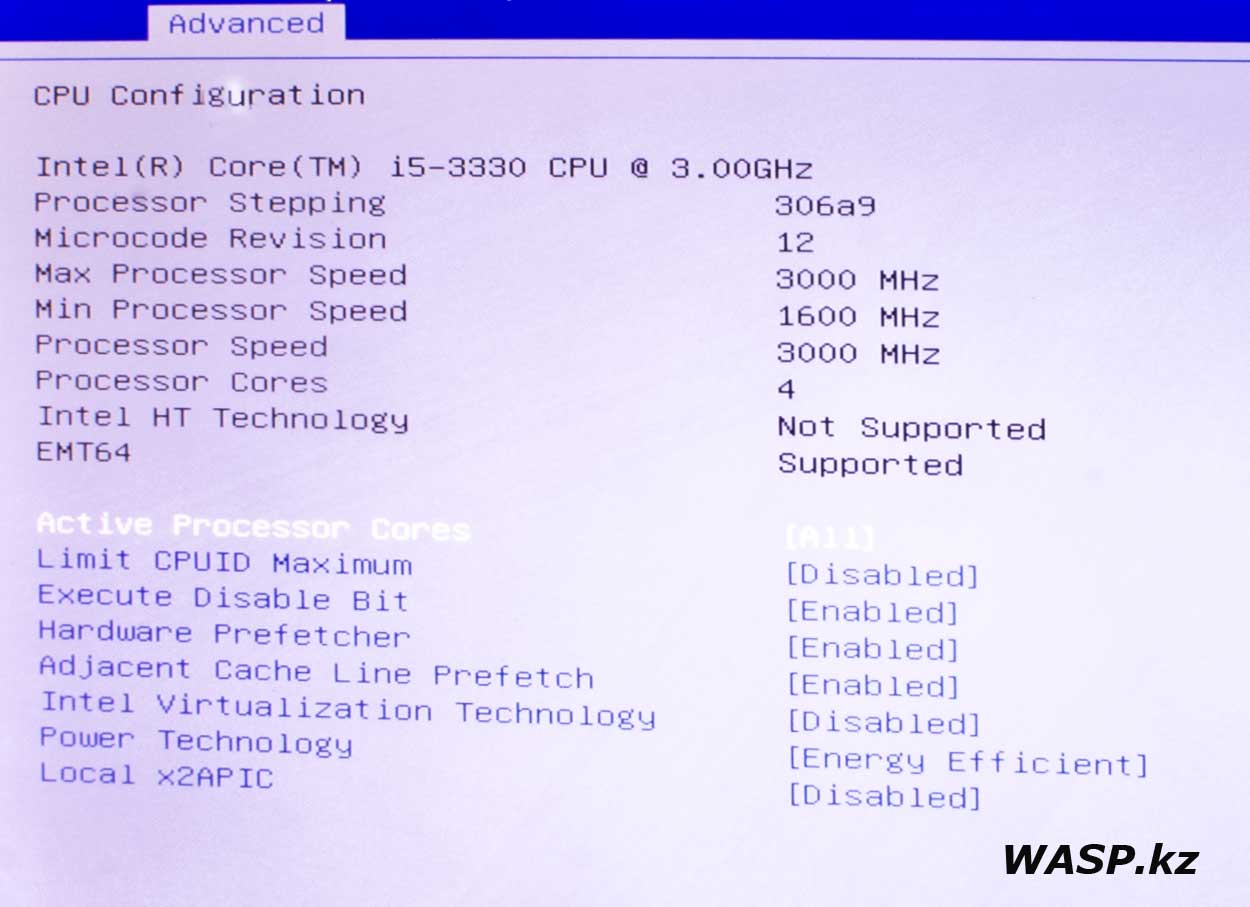
CPU Configuration - здесь информация о процессоре и некоторые возможности по его конфигурации. Как видим, у нас стоит Intel Core i5-3330, данные на него. Можно включить или выключить те или иные поддерживаемые функции.
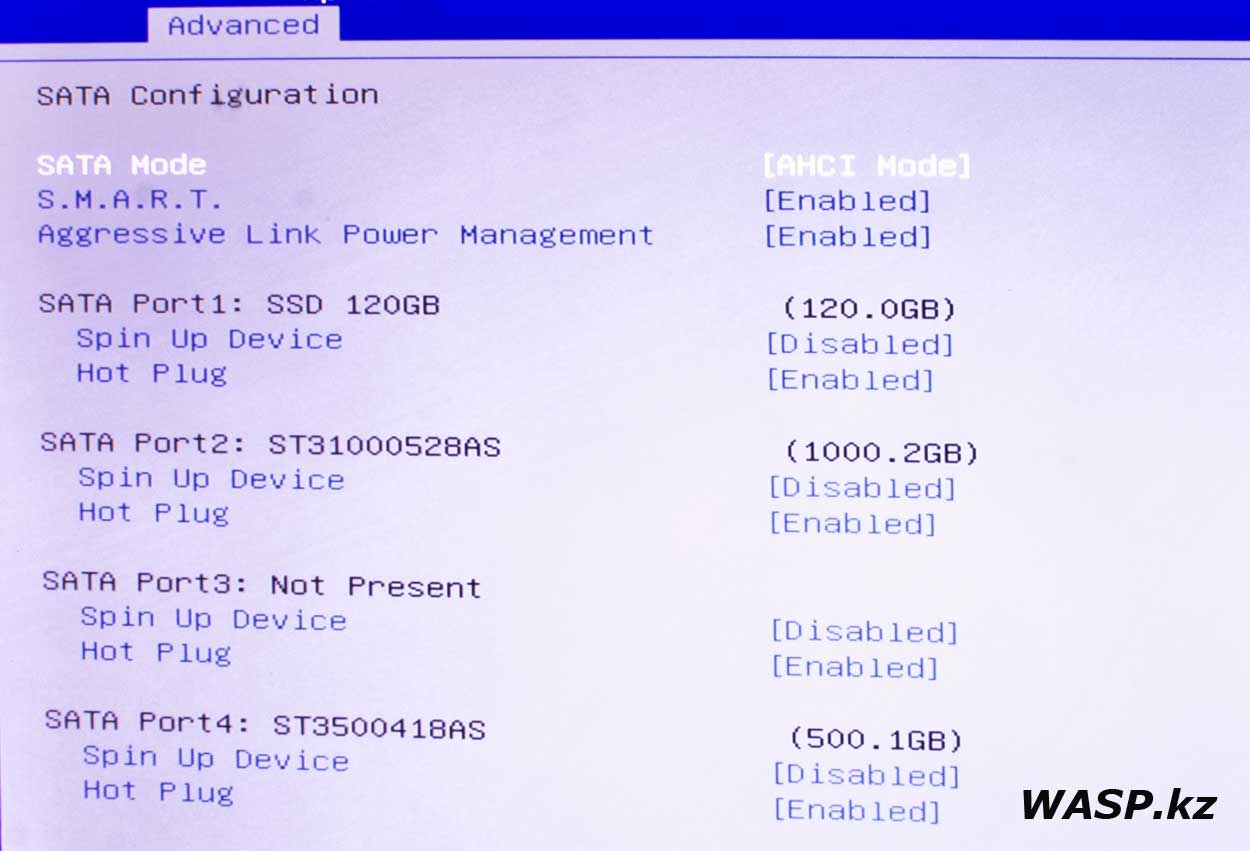
SATA Configuration - как понятно из названия, конфигурация SATA-устройств. Как видим, включен режим AHCI, подключено три накопителя - один SSD 120GB - под систему, и два обычных HDD - ST31000528AS и ST3500418AS.
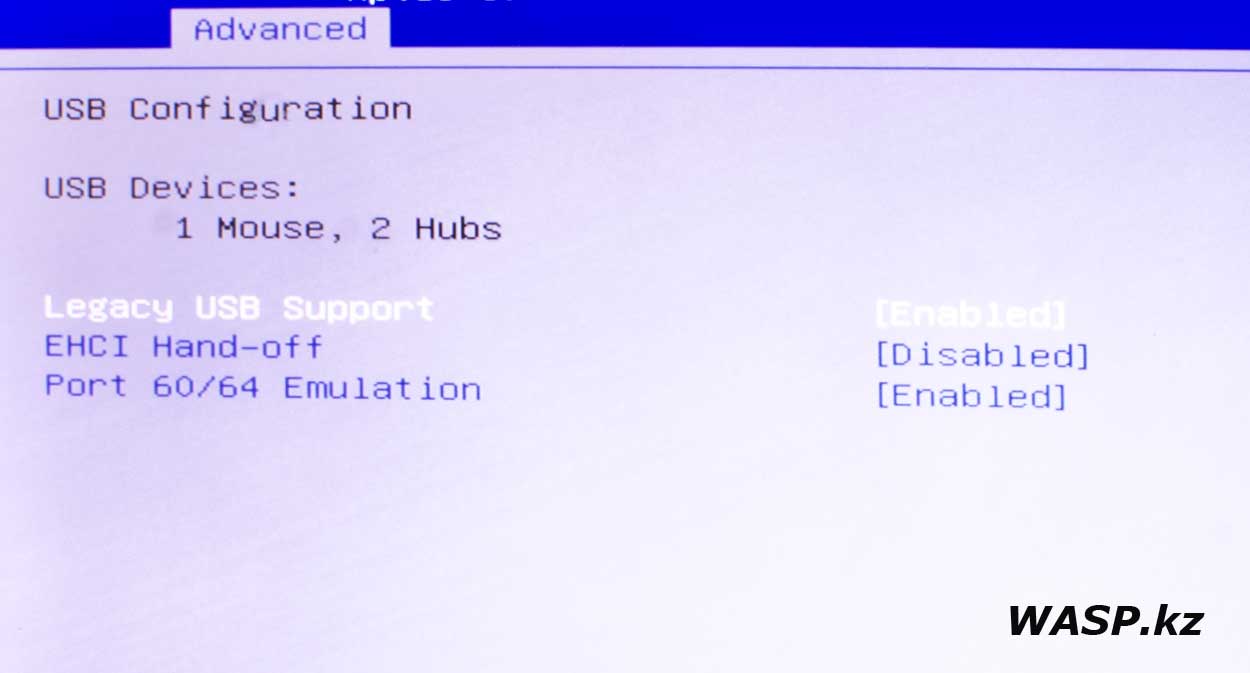
USB Configuration - в этом разделе можно настроить некоторые функции портов USB. Но без нужды ничего менять не стоит.
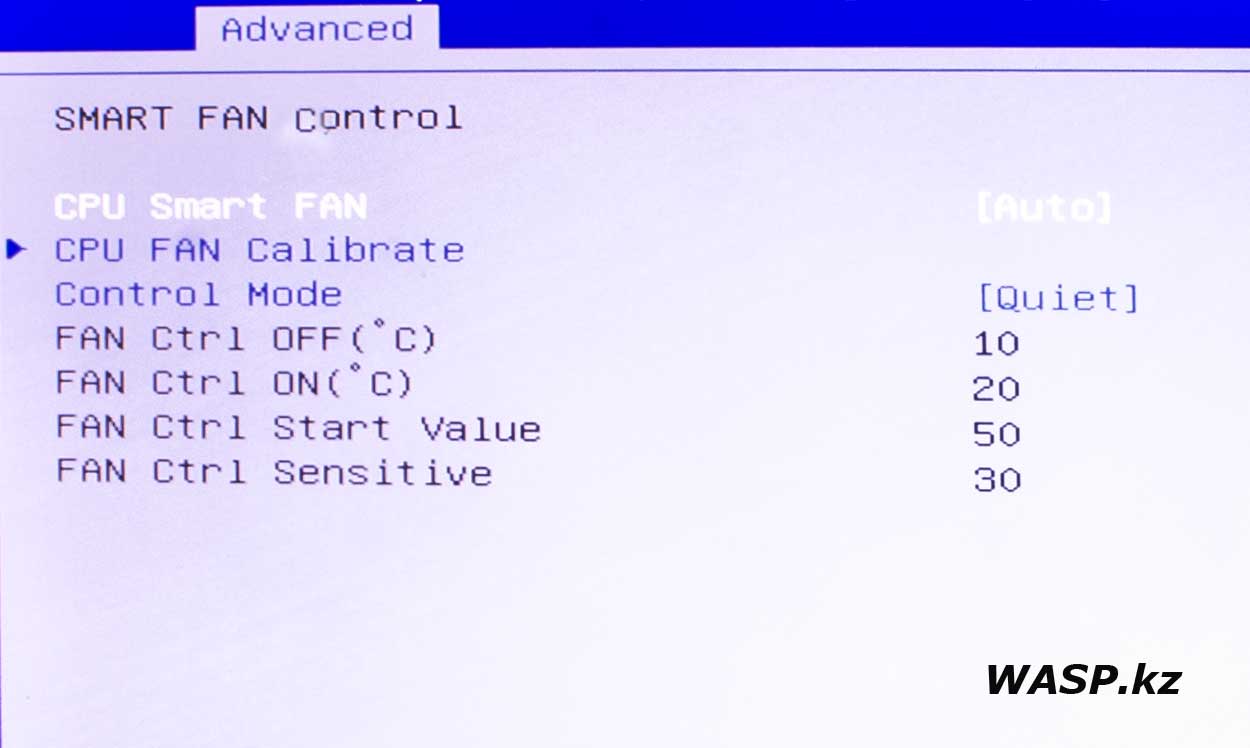
SMART FAN Control - это нужный пункт. Для комфортной работы рекомендуется покупать процессорный кулер с 4 проводами, тогда можно регулировать обороты вентилятора. Именно эта вкладка нам и дает такие возможности. У нас выставлен режим Auto - вентилятор сам будет изменять свои обороты.
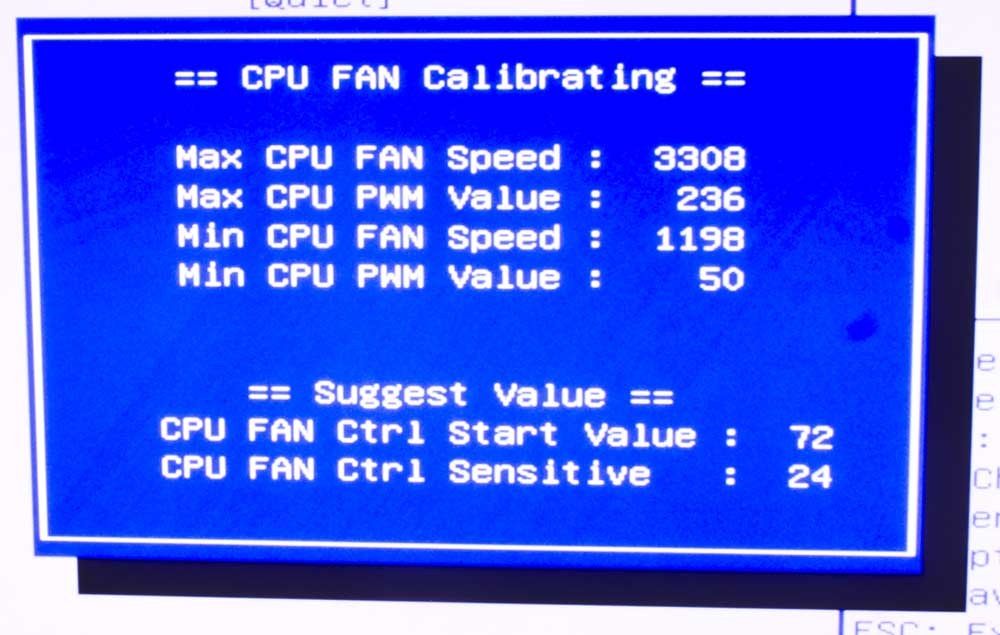
Для начала проводим калибровку - система сама все сделает за нас. Как видим, установленный кулер максимально вращается с оборотами 3308 об/мин. А минимально - 1198 об/мин. Тогда его практически не слышно.
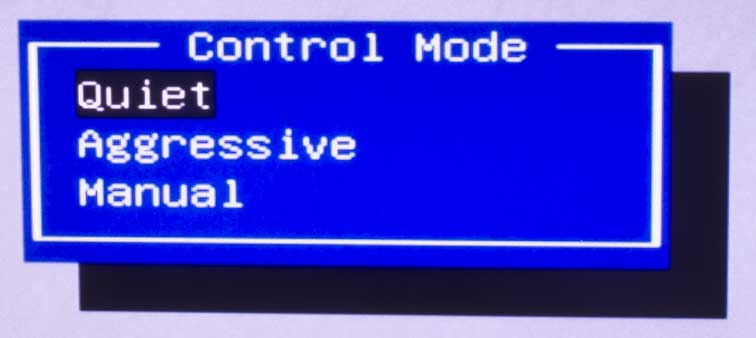
Можно выбрать три режима - Quiet, значит тихий. Потом Aggressive, работает на максимуме, это если вы балуетесь разгоном, но на такой материнке это вы вряд ли делать станете. Ну и ручной режим - Manual. Последний режим предпочтительнее, но он требует некоторых усилий, надо подбирать лучший режим, причем исходя из данного конкретного кулера на вашем процессоре. Здесь стоял достаточно поработавший (около 10 лет) DeepCool THETA 9 PWM - и он уже начал шуметь. К тому же он оказался не разборным, так что и смазать его не получилось...
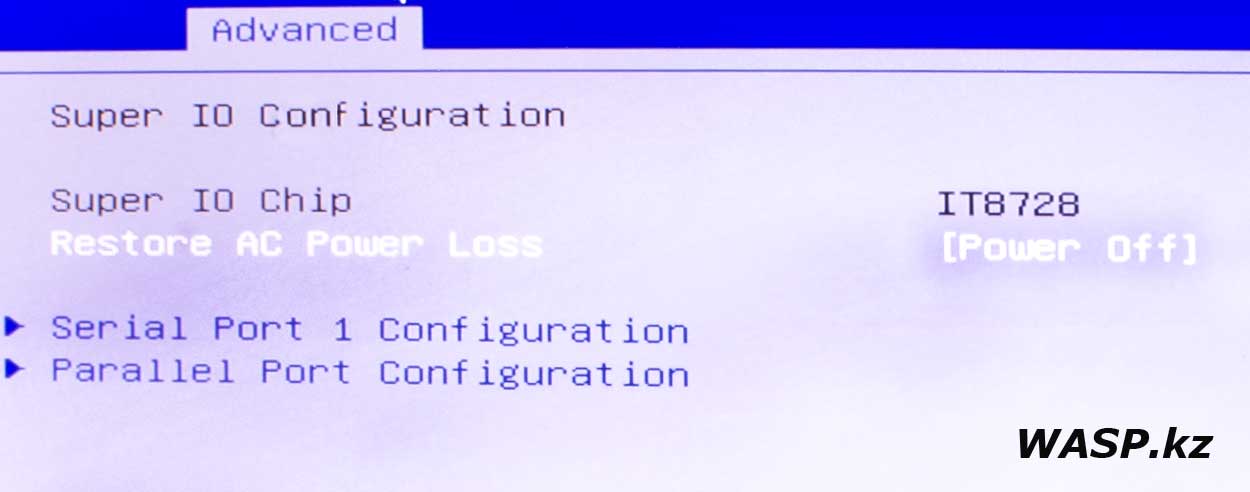
Вкладка Super IO Configuration - указан используемый чип, в первой части обзора мы его называли. Важный пункт - поведение ПК после внезапного отключения питания, здесь стоит - питание отключено, это значит, если пропадет свет и потом появится, компьютер не запустится, но можно выставить и автозапуск. Так же здесь два подпункта, касемые COM-порта и LPT-разъема... Открываем их.
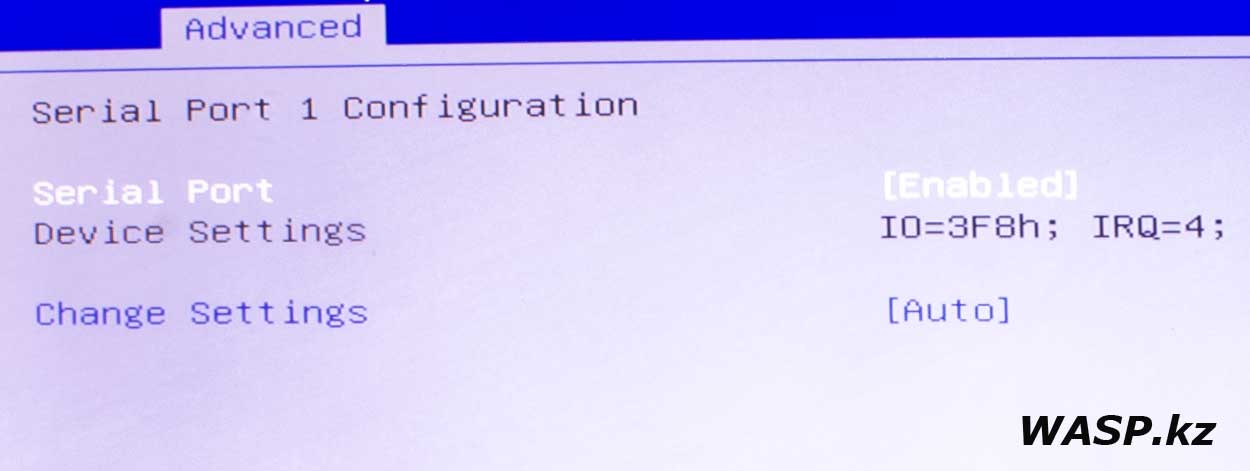
Serial Port 1 Configuration - я лично это отключаю, так как на матплате есть штырьковые разъемы, для подключения разъема на внешней планке. Но нужды в нем нет.
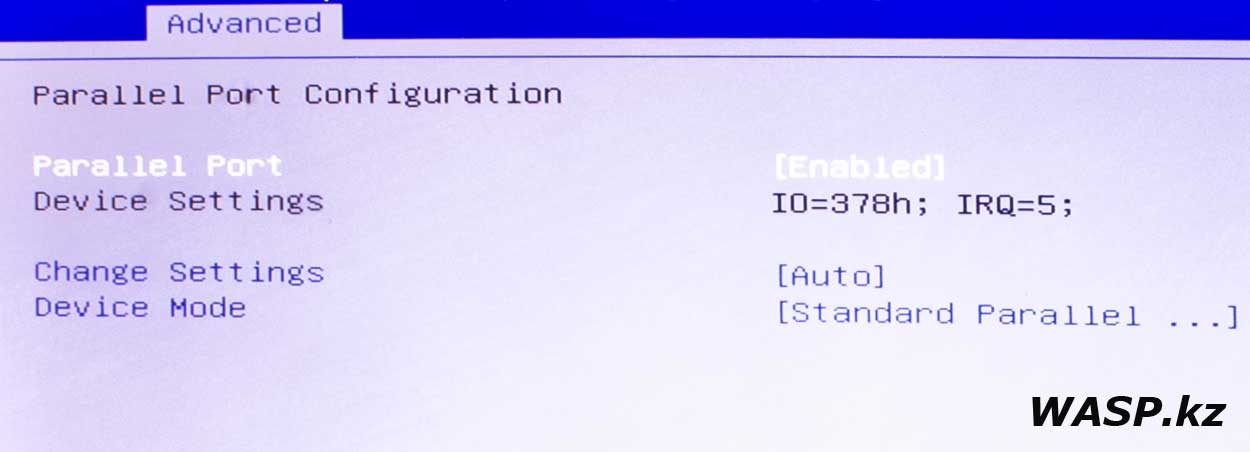
Parallel Port Configuration - и с этим точно то же самое, отключаю. Но, кому это надо, думаю, разберется и без наших объяснений.
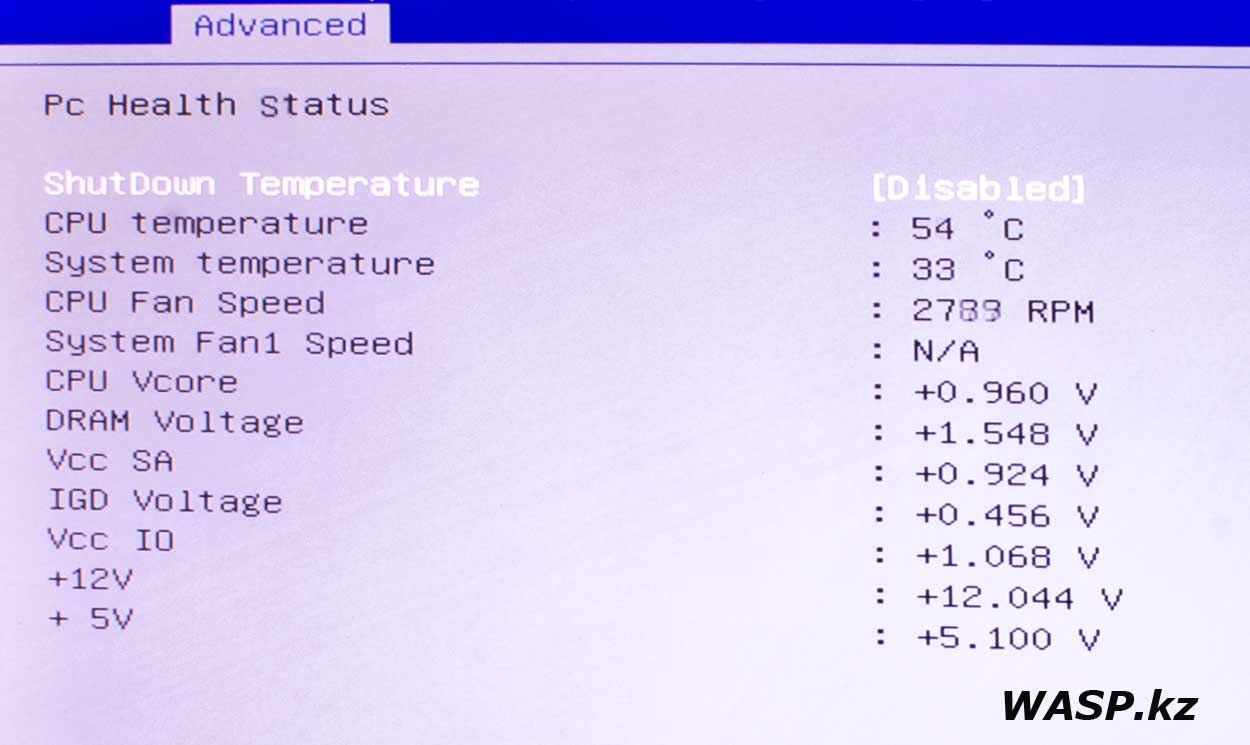
H/W Momitor - последний пункт в этом разделе. Вкладка еще называется - PC Health Status. Здесь всего один пункт, который можно включить или отключить ShutDown Temperature - это отключение с перезагрузкой ПК при перегреве процессора. Далее идут информационные данные: температура процессора и системы, обороты вентиляторов, вольтаж...
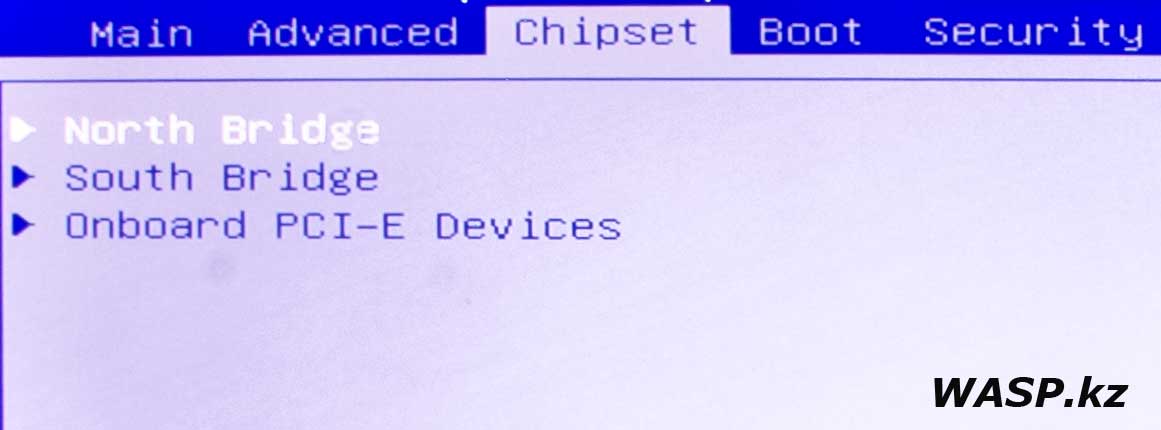
Chipset - третий раздел в настройках BIOS материнской платы Biostar H61MGC. Здесь всего три вкладки.
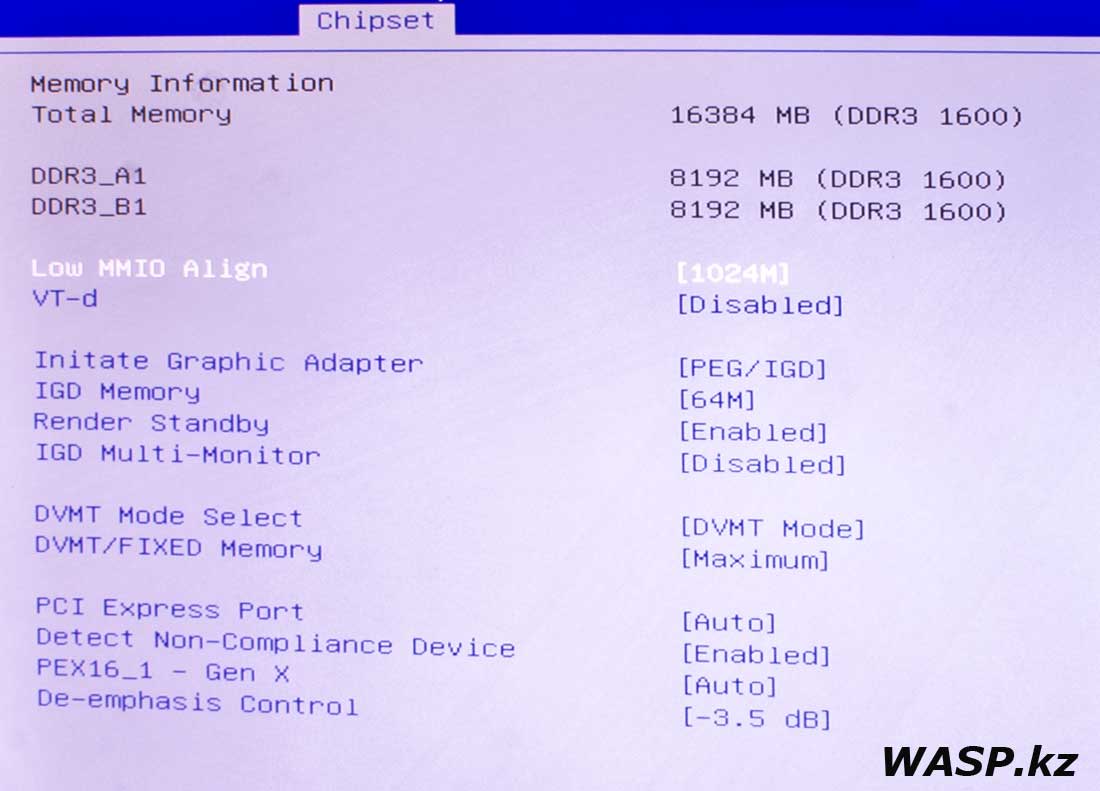
North Bridge - атавизм от прошлого, эта матплата одночипсетная. И львиную долю того, что раньше выполнял Северный мост, нынче выполняет сам процессор. В этой вкладке информация по оперативной памяти, настройки встроенного в процессор графического адаптера. VT-d технологии для виртуализации (если используете виртуальные машины, включите). Low MMIO Align - не трогаем. Настройка встроенного видео, здесь, как правило, все выставлено как надо: IGD Memory - выделенный минимум под работу встроенного видеоускорителя, менять смысла нет. Потому что далее есть пункт DVMT/FIXED Memory - Maximum, означает, что система сама выделит требуемое количество памяти на нужды видео (динамическое выделение памяти).
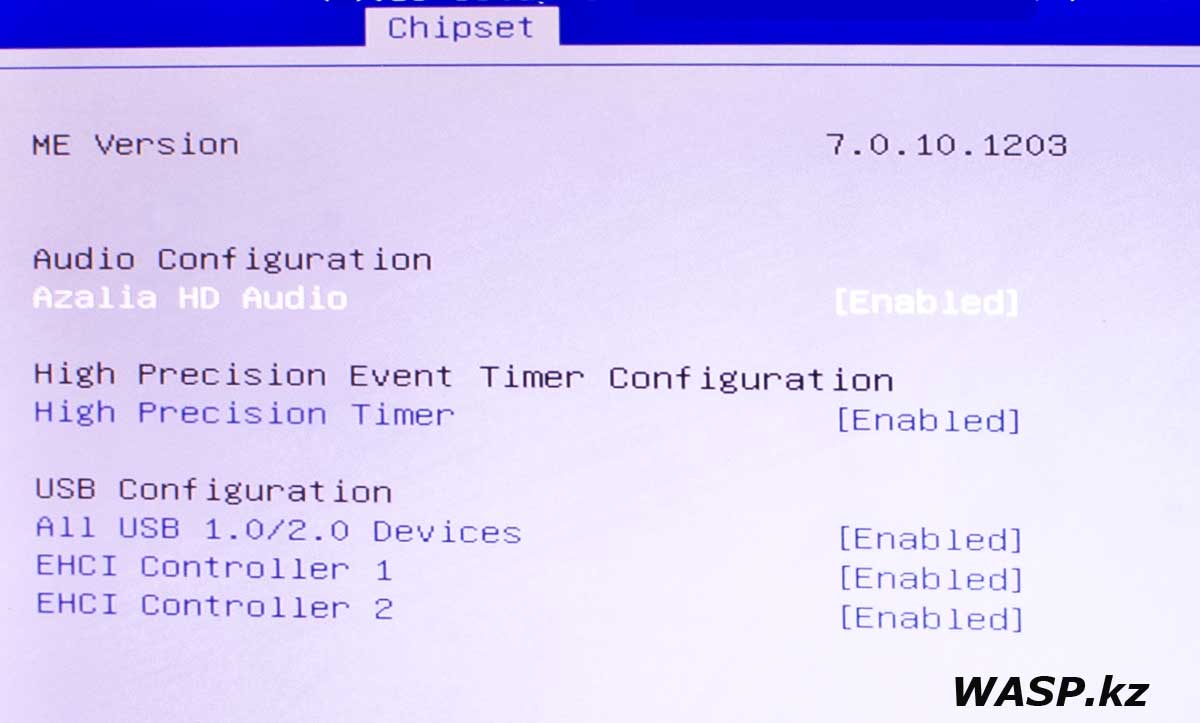
Вторая вкладка в разделе South Bridge - Южный мост. Здесь снова настройки USB, но уже другие. Указана версия ME 7.0.10.1203 - об технологии Intel Management Engine вы можете прочесть в интернете.
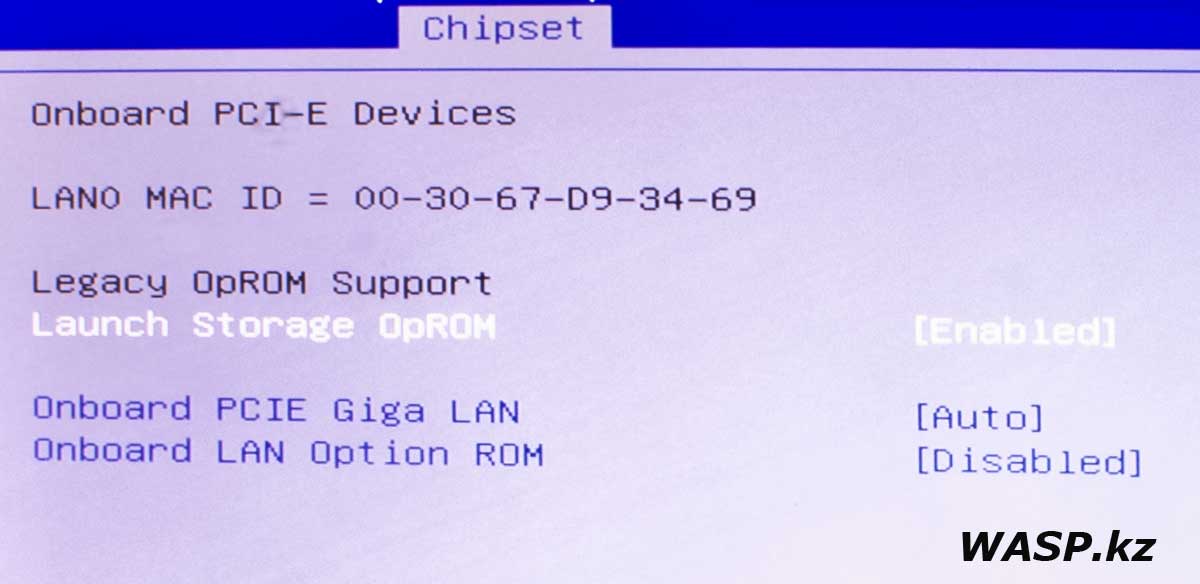
Onboard PCI-E Devices и это третья вкладка этого раздела. И здесь все по настройке сетевого контроллера LAN - не трогайте ничего.
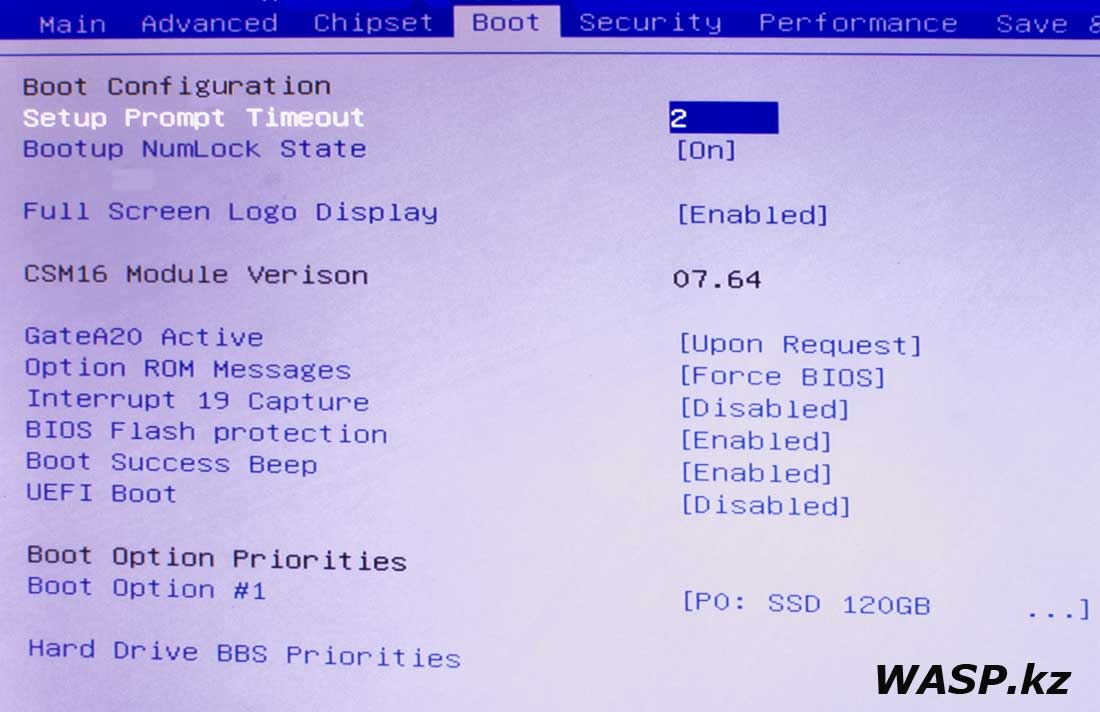
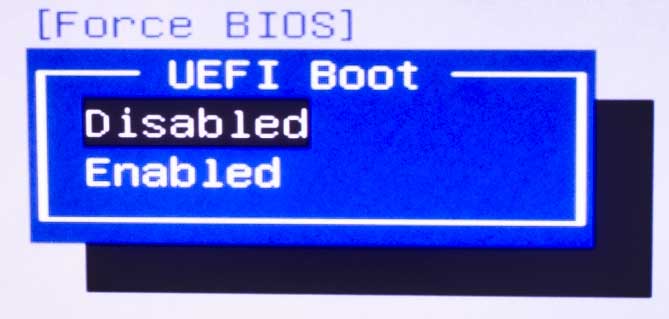
Boot - четвертый раздел БИОСа, и здесь все, что касается загрузки системы. Gate20 Active - стоит Upon Request, ну и пусть стоит. Option ROM Messages... Interrupt 19 Capture... UEFI Boot - этот пункт кому-то нужен, кому-то нет... Если загрузочная флешка создана под UEFI, то конечно надо включить. Но можно и выключить, чтобы получить возможность загрузки со сторонних загрузчиков. Ну а внизу идут устройства, с которых можно загружаться...
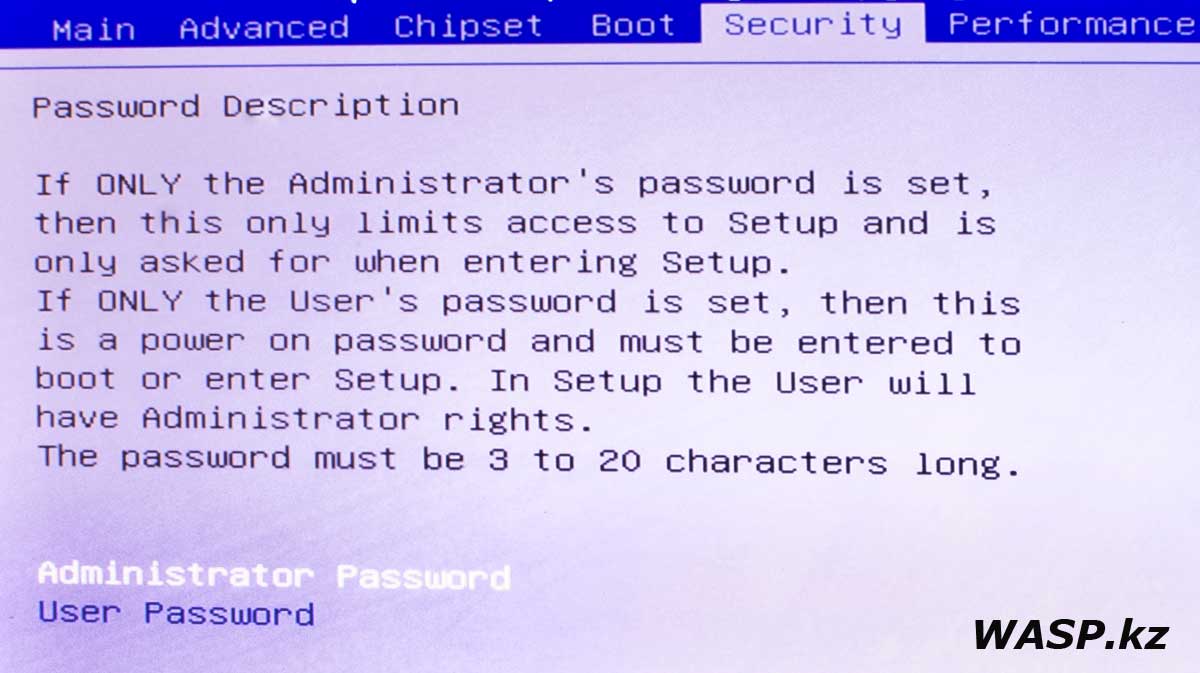
Еще один рудимент - Security, можно придумать и задать пароль для админа и юзера... бесполезная штука. Сброс осуществляется извлечением на несколько минут батарейки с матплаты.
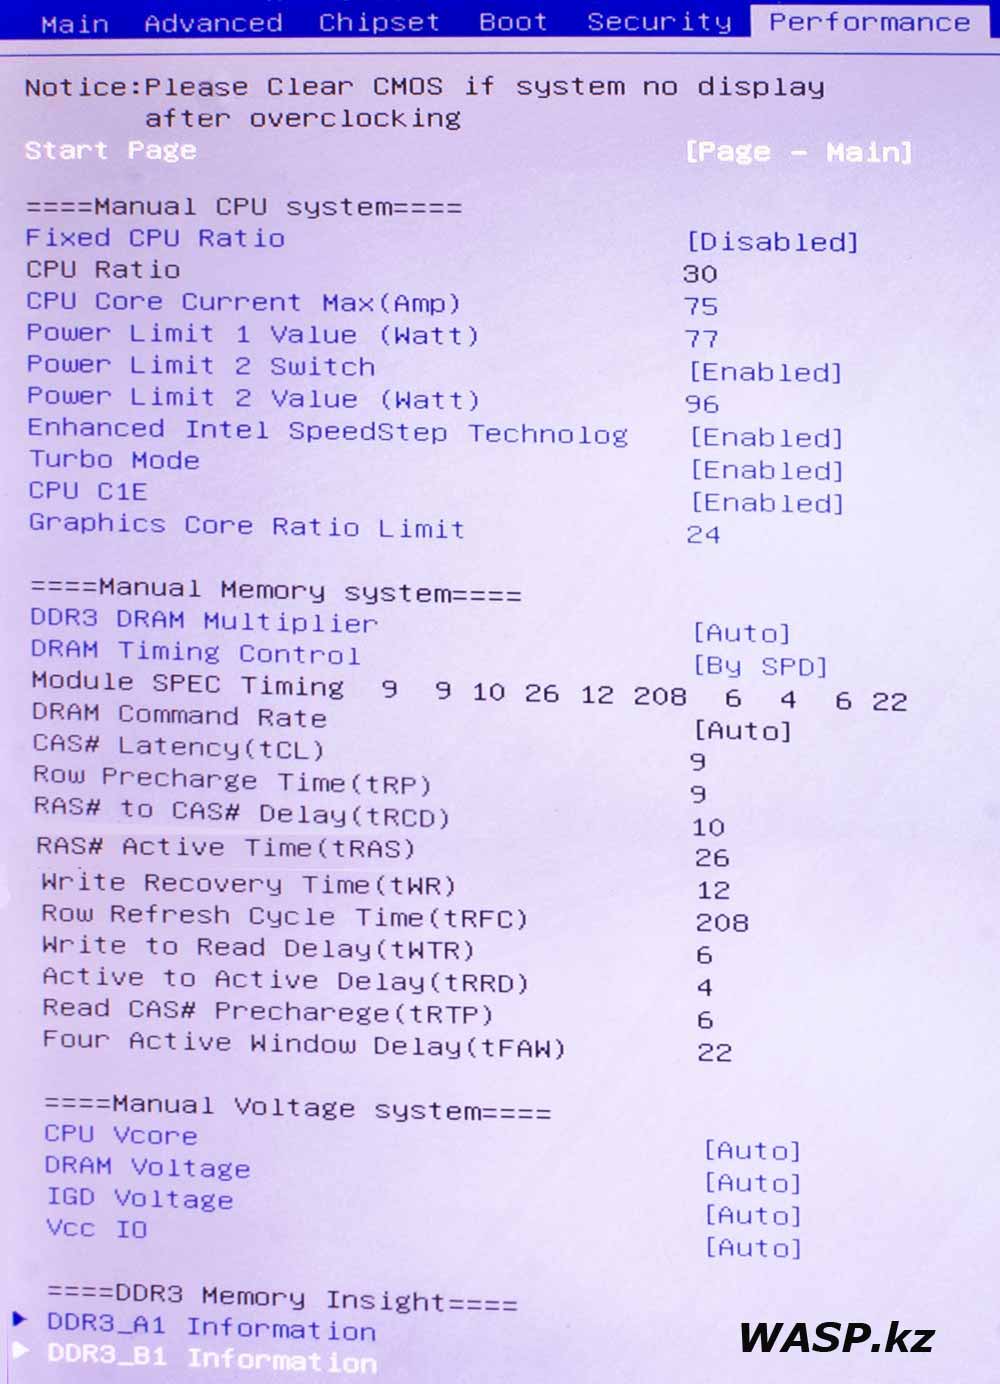
Performance - для многих это самый интересный раздел BIOS. Здесь сосредоточены все настройки по разгону, или настройкам на максимальную производительность. Разумеется, если вы не оверклокер - сперва изучайте каждый пункт и весь вопрос в целом. Прокрутив список, в самом низу есть подробная информация о памяти - в данном случае стоят два модуля ОЗУ Kingston HyperX Fury HX318C10FB/8 - общим объемом 16 Гб, память явно не для этой матплаты...

Save & Exit - сохранить и выйти. Последний раздел, сохраняем все изменения и выходим, проходит перезагрузка и мы любуемся тем, что натворили! Если мы видим просто черный экран, и ничего не происходит, значит, мы накосячили. Отключаем ПК от электрической сети и потом перемычкой Clear CMOS или просто извлечением батарейки на несколько минут, сбрасываем все настройки. Теперь нам снова придется жать вначале Del и выставить хотя бы правильную дату и время...
Как видим, BIOS материнской платы Biostar H61MGC достаточно прост, но, на мой взгляд, этой матплате можно было сделать его еще проще... Что нам непонятно, можем узнать в интернете.
Работа материнской платы Biostar H61MGC
Сюда ставился SSD на 120 Гб со старой материнской платы - ECS Elitegroup Z77H2-A3, которая вышла из строя. Очень не хотелось переустанавливать Windows, и этого не пришлось делать. Если Windows 7 на этом SSD выбрасывала в синий экран на матплатах с чипсетом Intel G31 и P45/G45. То здесь она встала без проблем и установила большинство драйверов. Все равно, драйвера были скачаны с офсайта Биостар и установлены.
Компьютер работает без проблем. Как говорит хозяин - все отлично, ну или примерно так - смотрите по ссылке его мнение на нашем Форуме.
Итого - выводы
Материнская плата Biostar H61MGC является типичным представителем самых дешевых массовых продуктов, по низкой цене. При этом она обеспечивает базовые возможности и по исполнению уровень качества достаточно высок.
Эта маплата одинаково хорошо будет работать и в офисном ПК и мультимедийном центре, если вы играете в компьютерные игры и у вас ограниченный бюджет - тоже не беда, эта матплата без проблем справится и с этой задачей, при условии наличия соответствующей дискретной видеокарты, разумеется.
Михаил Дмитриенко, WASP.kz
Алма-Ата
07.12.2023
Biostar H61MGC LGA1155 motherboard, part 2
Part 1 - Part 2
Let's get started, and the first thing we need to do is look into the BIOS. First, a beautiful screensaver flashes quickly, which I don’t have time to photograph, then the initial screen appears and we need to press the Del button. Here we have the old familiar BIOS, not the oldest, of course, but which is now almost a thing of the past...
+ Click on photo to enlarge!
There are no beautiful UEFI pictures. The mouse doesn't work. There is a choice of language, but there is none - everything is only in English. But this simplicity is even pleasant.
BIOS of Biostar H61MGC motherboard
Main - as usual, this is the first tab. Here's the information. Our BIOS is AMI - American Megatrends. Inc. Version 2.10.1208. On the screen we see the following information about the BIOS: compliance with AMI UEFIx64 2.0. Project code IH61N-MHS. Motherboard model H61MGC. BIOS firmware version - H61NR305.BSS dated 05/03/2013 - this is the latest firmware version released. Next comes information about RAM - 16384 MB (DDR3 1600). System language - English. Here you can change the date and time.
Advanced is the second tab, and there are eight items that have their own settings, let’s take a closer look at them.
PCI Subsystem Settings - here are the settings for the PCI subsystem, if you don’t understand anything here, it’s better not to touch anything. The default values work fine.
ACPI Settings / WakeUp Event Control - distribution and configuration of power, on/off... Also, you shouldn’t touch or change anything unnecessarily.
CPU Configuration - here is information about the processor and some options for its configuration. As you can see, we have an Intel Core i5-3330, data for it. You can enable or disable certain supported features.
SATA Configuration - as the name implies, the configuration of SATA devices. As you can see, AHCI mode is enabled, three drives are connected - one 120GB SSD for the system, and two regular HDDs - ST31000528AS and ST3500418AS.
USB Configuration - in this section you can configure some functions of the USB ports. But there is no need to change anything unless necessary.
SMART FAN Control is the right item. For comfortable operation, it is recommended to buy a processor cooler with 4 wires, then you can adjust the fan speed. It is this tab that gives us such opportunities. We have the Auto mode set - the fan itself will change its speed.
First, we carry out calibration - the system itself will do everything for us. As you can see, the installed cooler rotates at a maximum speed of 3308 rpm. And the minimum is 1198 rpm. Then you can hardly hear him.
You can choose three modes - Quiet, which means quiet. Then Aggressive, it works at maximum, this is if you indulge in overclocking, but you are unlikely to do this on such a motherboard. Well, manual mode - Manual. The latter mode is preferable, but it requires some effort; you need to select the best mode, based on the specific cooler on your processor. There was a DeepCool THETA 9 PWM that had worked quite a bit (about 10 years) - and it was already starting to make noise. In addition, it turned out to be non-separable, so it was not possible to lubricate it...
Super IO Configuration tab - the chip used is indicated; we named it in the first part of the review. An important point is the behavior of the PC after a sudden power outage, here it is - the power is turned off, this means that if the light goes out and then appears, the computer will not start, but you can also set it to autostart. There are also two sub-items regarding the COM port and LPT connector... Open them.
Serial Port 1 Configuration - I personally disable this, since the motherboard has pin connectors for connecting a connector on an external bracket. But there is no need for it.
Parallel Port Configuration - and this is exactly the same thing, I turn it off. But whoever needs it, I think, will figure it out without our explanations.
H/W Momitor is the last item in this section. The tab is also called PC Health Status. There is only one item that you can enable or disable ShutDown Temperature - this is a shutdown with rebooting the PC when the processor overheats. Next comes information data: processor and system temperature, fan speed, voltage...
Chipset is the third section in the BIOS settings of the Biostar H61MGC motherboard. There are only three tabs here.
North Bridge is a throwback from the past, this motherboard is single-chipset. And the lion's share of what the Northbridge used to do is now done by the processor itself. This tab contains information on RAM and settings for the graphics adapter built into the processor. VT-d technologies for virtualization (if you use virtual machines, enable). Low MMIO Align - don't touch it. Setting up the built-in video, here, as a rule, everything is set as it should: IGD Memory - a dedicated minimum for the operation of the built-in video accelerator, there is no point in changing it. Because next there is the item DVMT/FIXED Memory - Maximum, which means that the system itself will allocate the required amount of memory for video needs (dynamic memory allocation).
The second tab in the South Bridge section is the South Bridge. Here are the USB settings again, but different. The version indicated is ME 7.0.10.1203 - you can read about Intel Management Engine technology on the Internet.
Onboard PCI-E Devices and this is the third tab of this section. And here's everything about setting up the LAN network controller - don't touch anything.
Boot is the fourth section of the BIOS, and here is everything that concerns booting the system. Gate20 Active - worth Upon Request, so be it. Option ROM Messages... Interrupt 19 Capture... UEFI Boot - some people need this item, others don’t... If the bootable flash drive is created for UEFI, then of course you need to enable it. But you can turn it off to be able to boot from third-party bootloaders. Well, below are the devices from which you can boot...
Another rudiment is Security, you can come up with and set a password for the administrator and the user... a useless thing. The reset is carried out by removing the battery from the motherboard for a few minutes.
Performance - for many, this is the most interesting section of the BIOS. All overclocking settings, or settings for maximum performance, are concentrated here. Of course, if you are not an overclocker, first study each point and the whole question as a whole. Scrolling through the list, at the very bottom there is detailed information about the memory - in this case there are two Kingston HyperX Fury HX318C10FB/8 RAM modules - with a total capacity of 16 GB, the memory is clearly not for this motherboard...
Save & Exit - save and exit. The last section, we save all the changes and exit, the reboot takes place and we admire what we have done! If we just see a black screen and nothing happens, then we've messed up. We disconnect the PC from the electrical network and then use the Clear CMOS jumper or simply remove the battery for a few minutes to reset all settings. Now we will again have to press Del first and set at least the correct date and time...
As you can see, the BIOS of the Biostar H61MGC motherboard is quite simple, but, in my opinion, this motherboard could have made it even simpler... What we don’t understand, we can find out on the Internet.
Biostar H61MGC motherboard operation
A 120 GB SSD was installed here from an old motherboard - ECS Elitegroup Z77H2-A3, which failed. I really didn't want to reinstall Windows, and I didn't have to do that. If Windows 7 on this SSD threw a blue screen on motherboards with the Intel G31 and P45/G45 chipset. Here it got up without problems and installed most of the drivers. Anyway, the drivers were downloaded from the Biostar website and installed. The computer works without problems. As the owner says, everything is fine, or something like this - see the link for his opinion on our Forum.
Total - conclusions
The Biostar H61MGC motherboard is a typical representative of the cheapest mass-produced products at a low price. At the same time, it provides basic capabilities and the level of quality in execution is quite high. This motherboard will work equally well in an office PC and a multimedia center, if you play computer games and have a limited budget - it’s also not a problem, this motherboard will cope with this task without any problems, provided you have an appropriate discrete video card, of course.
Mikhail Dmitrienko, WASP.kz
Almaty
07.12.2023 |

