Epson Perfection 660 - разборка и чистка сканера
1 - внешний обзор и полное описание
2 - разборка для ремонта, профилактики и чистки
Этот материал у меня, в общем-то, был давно подготовлен, но руки все не доходили оформить всё в статью. А тут у нас на Форуме подняли вопрос по этому сканеру, поэтому напишу как есть - как получится.
У меня этот сканер тоже иногда начинал "полосить"... Но потом это само-собой прекращалось, не знаю, по какой причине. Пока, наконец, появилась полоса и уже не пропадала... Пришлось разбирать. Информации о разборке этого сканера я не имел, и потому разбирал "на ощупь" - это мне удалось не сразу и не обошлось без потерь...
+ Щелкайте по фото, чтобы увеличить!

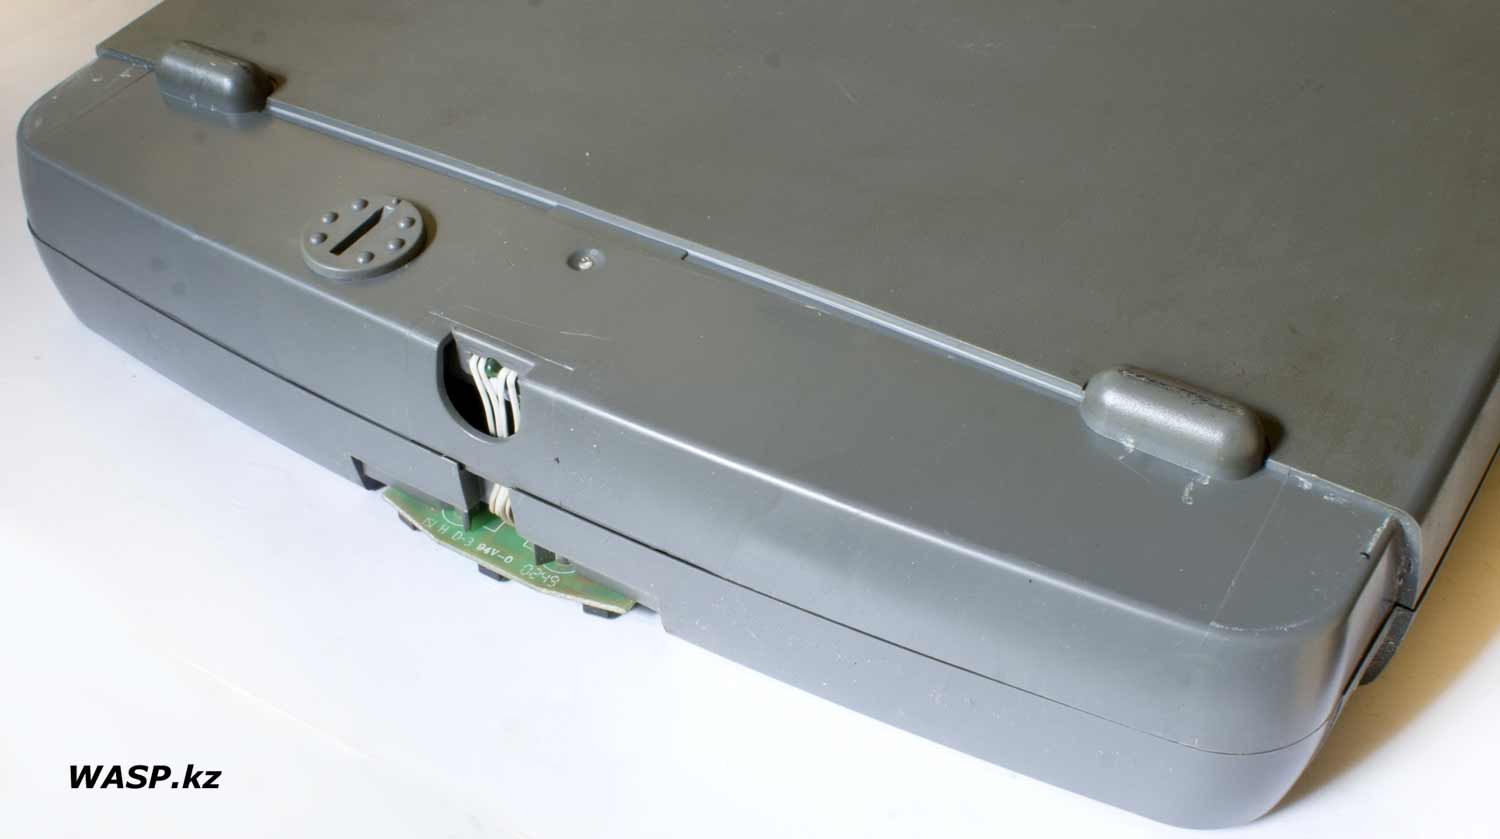
Как в комментариях написано, разборку надо начинать с передней панели - "мордашки"... И начинать это надо с нижней стороны. На панели есть две выступающие полоски, они сидят в таких же углублениях на корпусе. Эти полоски небольшие и их сравнительно легко освободить. Круглый выступ - фиксатор подвижной головки (каретки), мешается, но аккуратно поддевая плоской металлической лопаткой, обходим и его. Главное не торопиться...

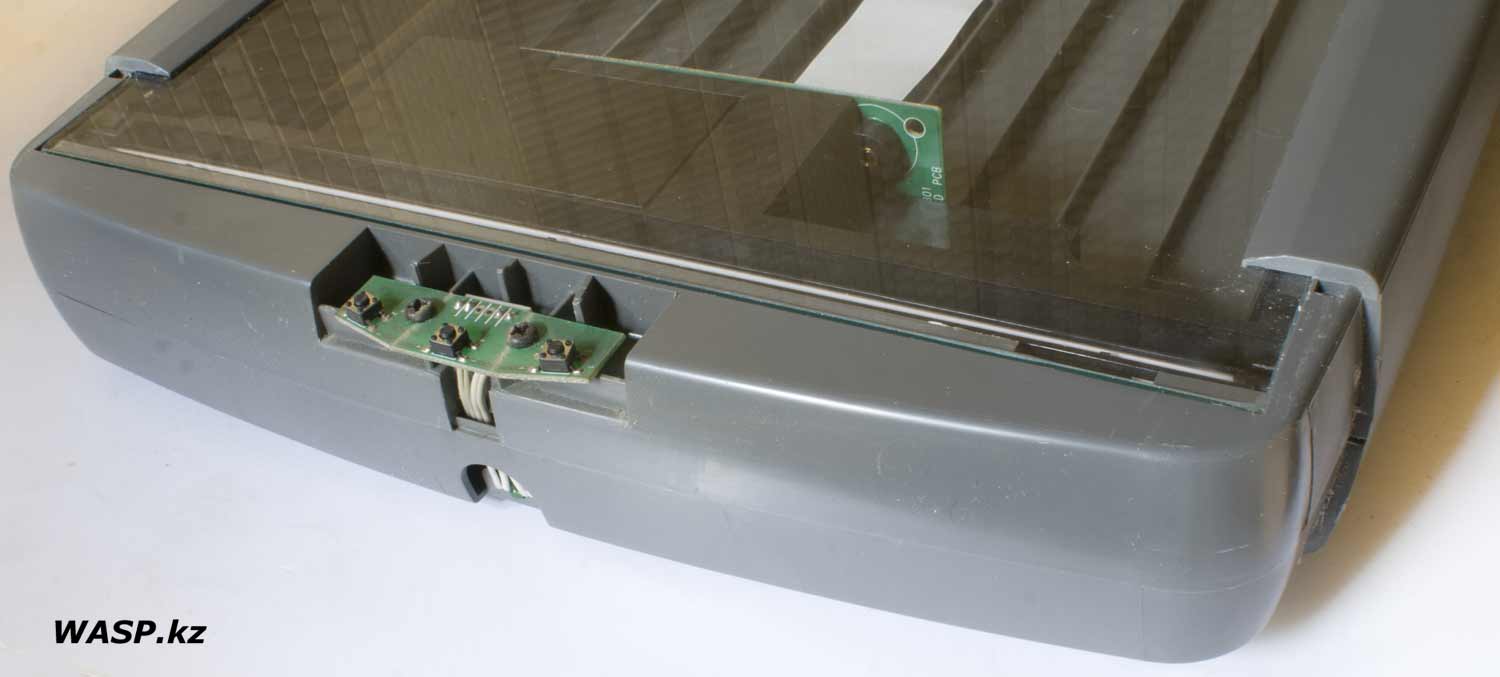
Сверху как два зубчика две защелки, и они у меня отлетели. Дело видимо было в том, что пластмасса со временем стала хрупкой... Впрочем, поломка этих зубчиков не грозит ничем страшным.
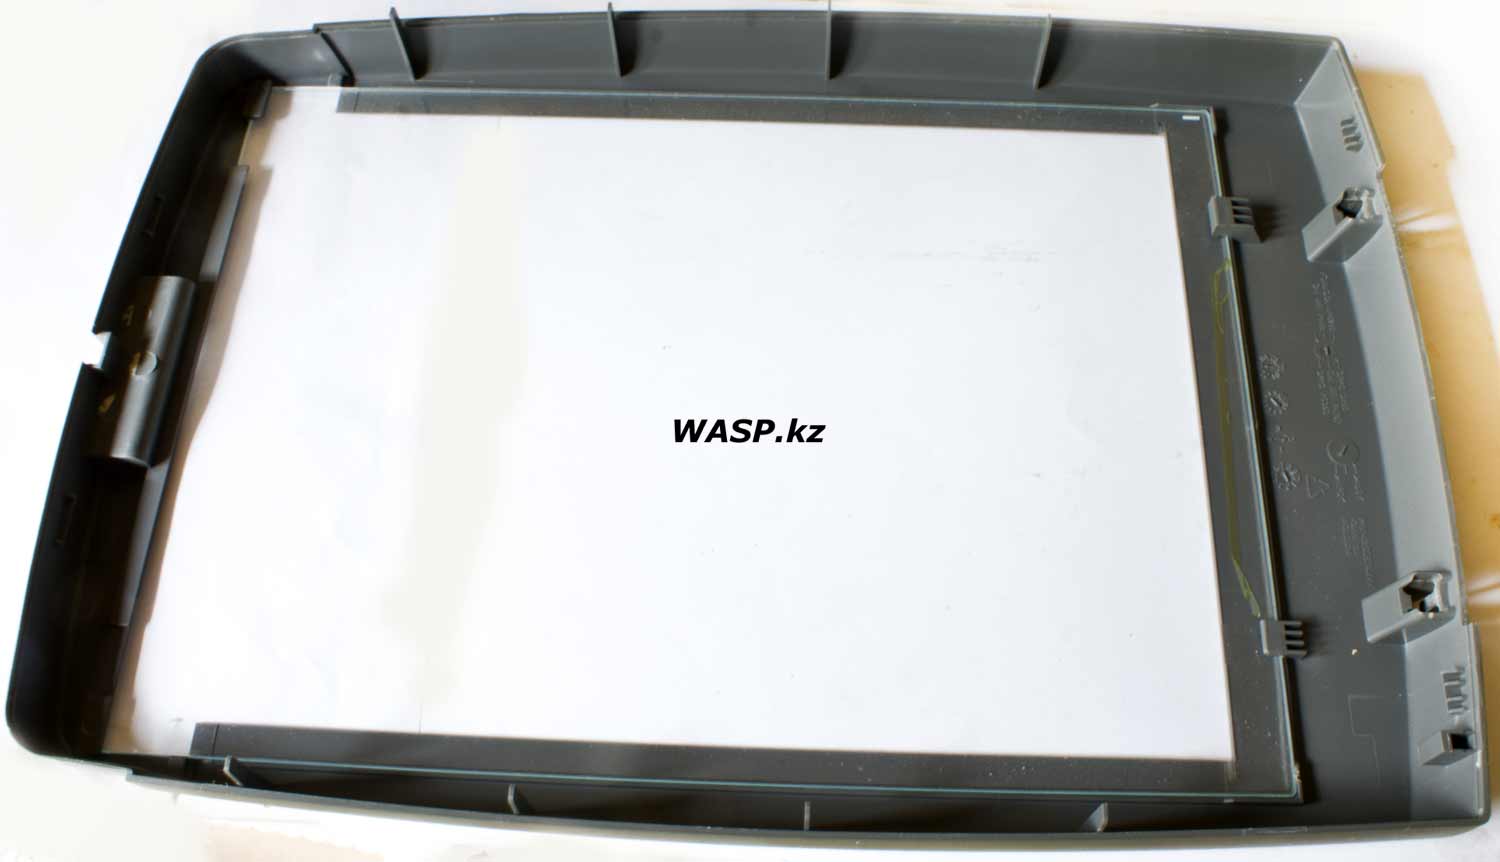
- Вот и первый момент, как вы можете видеть, в эту панель вклеены полоски белой пленки, с черными линиями, прямоугольниками и так далее - это образцы для самотестирования. В самом начале, после включения сканера, каретка делает 2-3 коротких движения именно взаимодействуя с этим элементом. И он должен быть чистым. Часто именно из-за пятна грязи, сканер не может правильно откалибровать матрицу, и получаются полосы...
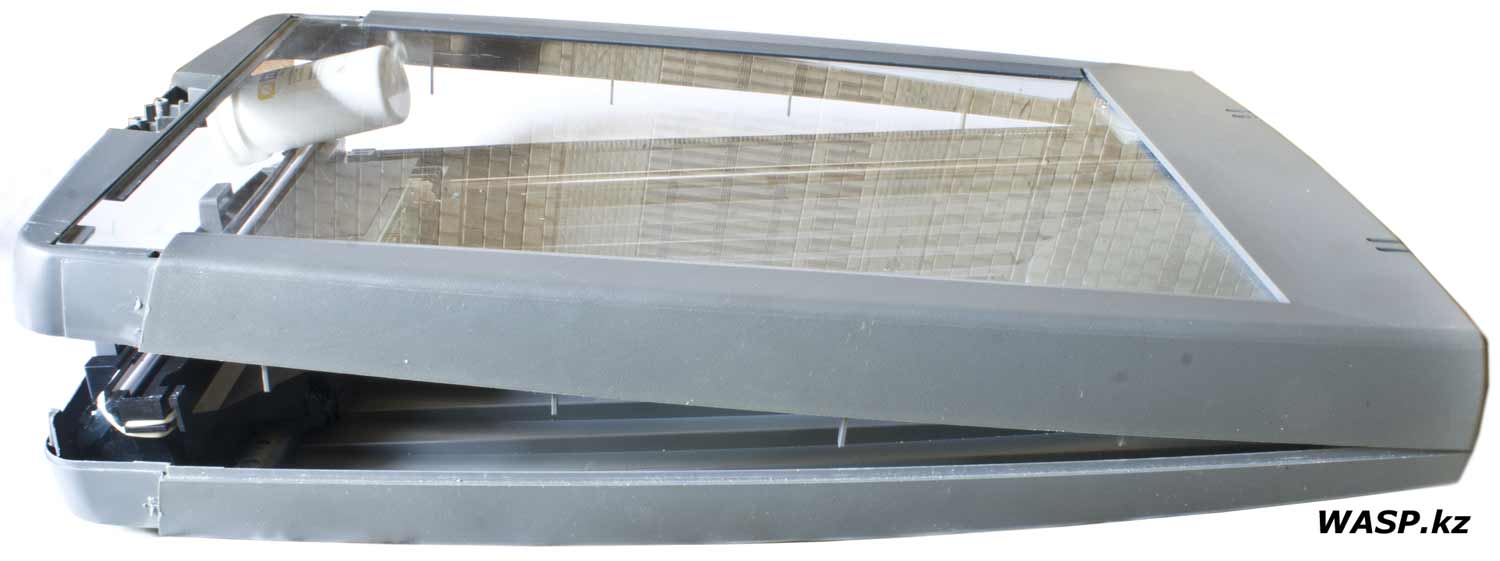


Разделяем корпус сканера на две половинки - в передней стороне две защелки, смотрим на фото, как устроены защелки! Переднюю часть отстегиваем и приподнимаем, одновременно сдвигаем ее назад. Конечно, материм разработчиков, и поделом!
Вот и разобрали сканер Epson Perfection 660 - теперь надо все очистить внутри. Внутри много пыли... везде какой-то налет... и на рабочем стекле изнутри! Я брызнул "Мистер мускул" и все мгновенно оттер. Стараемся ничего не пропустить.
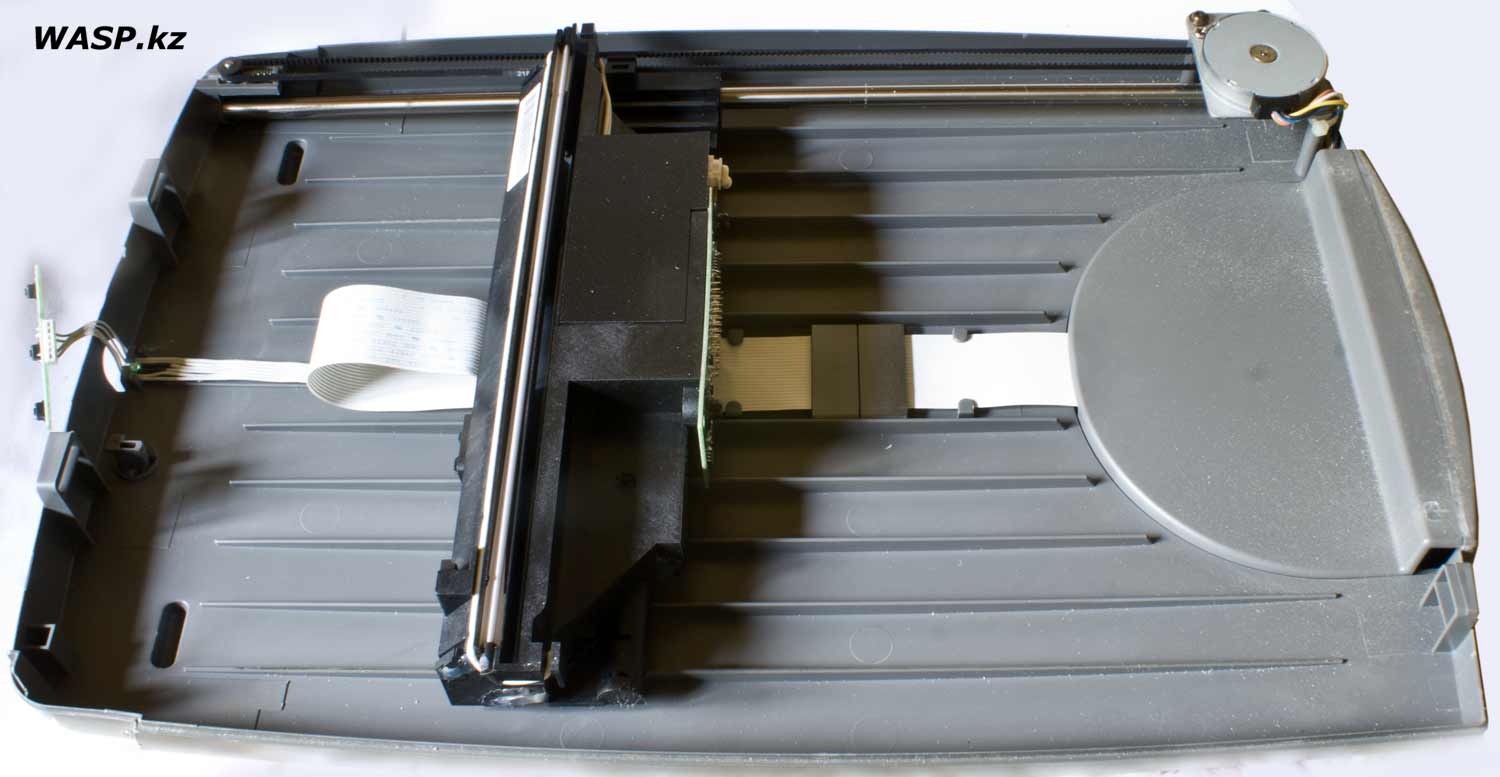
Теперь чистим нижнюю часть корпуса. Продуваем, кисточкой и так далее...
Здесь есть один важный момент: решитесь вы на полную очистку, с максимально полной разборкой, или ограничитесь чисткой лишь доступных элементов?
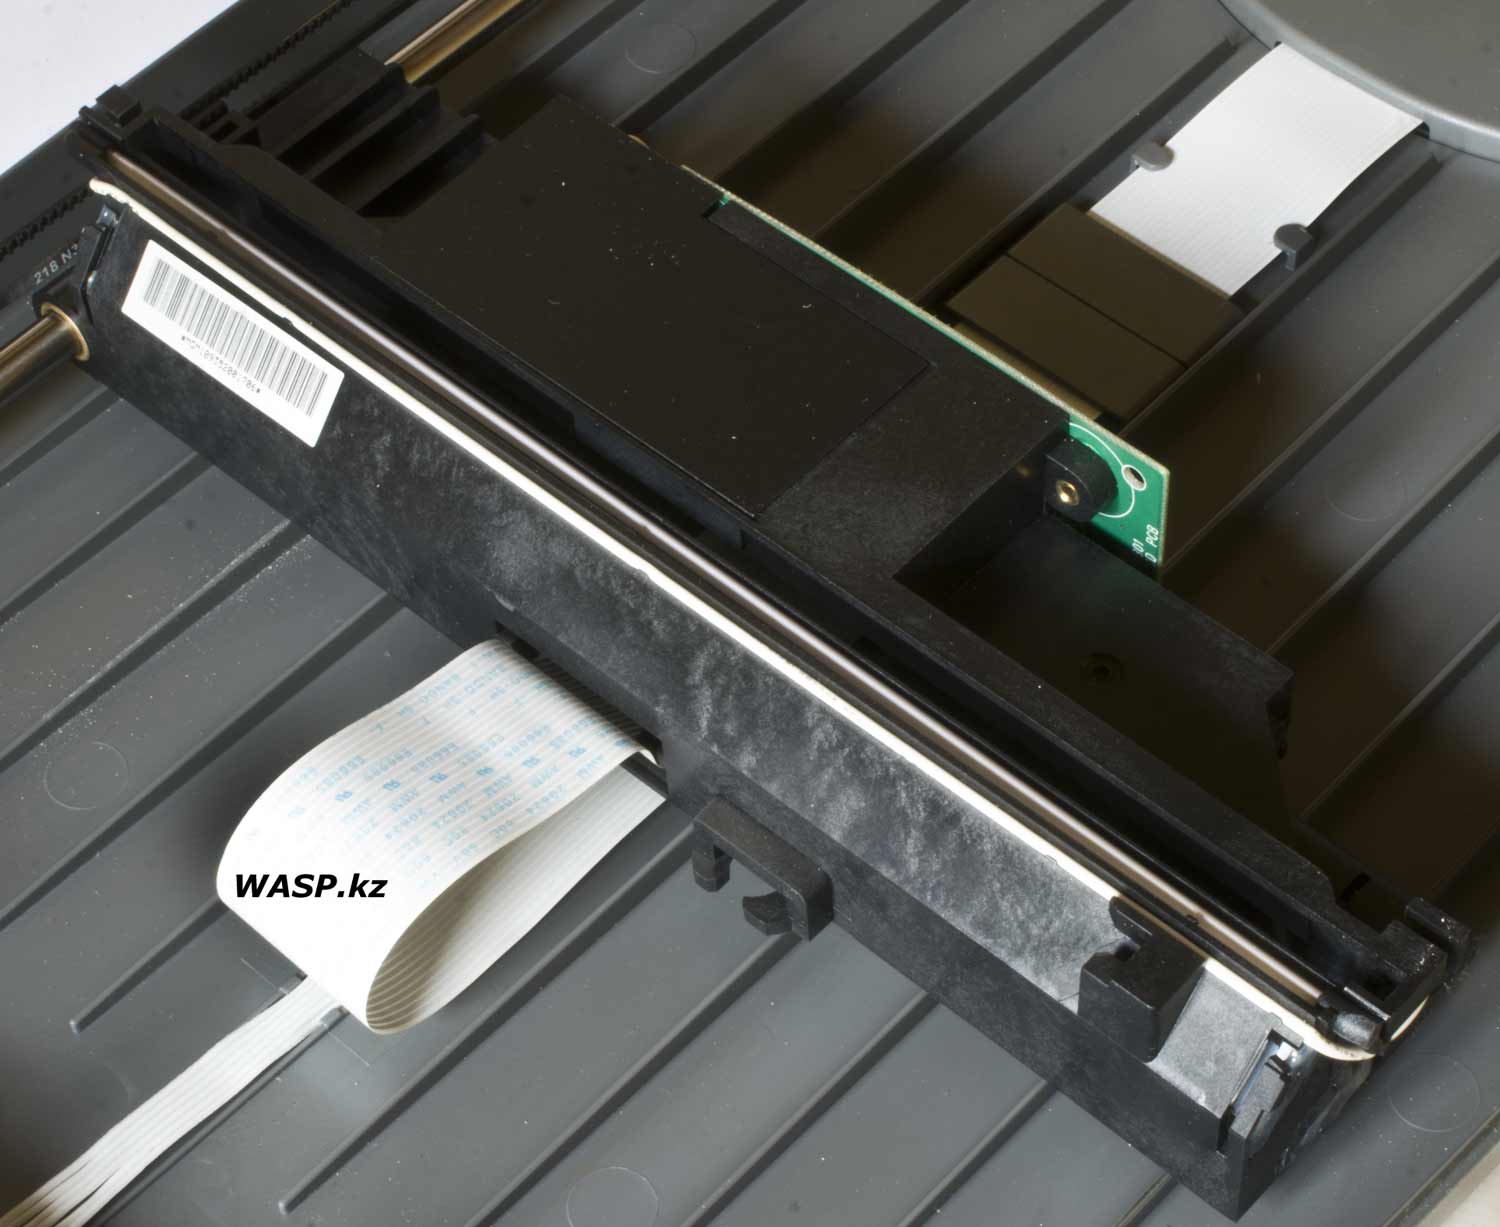
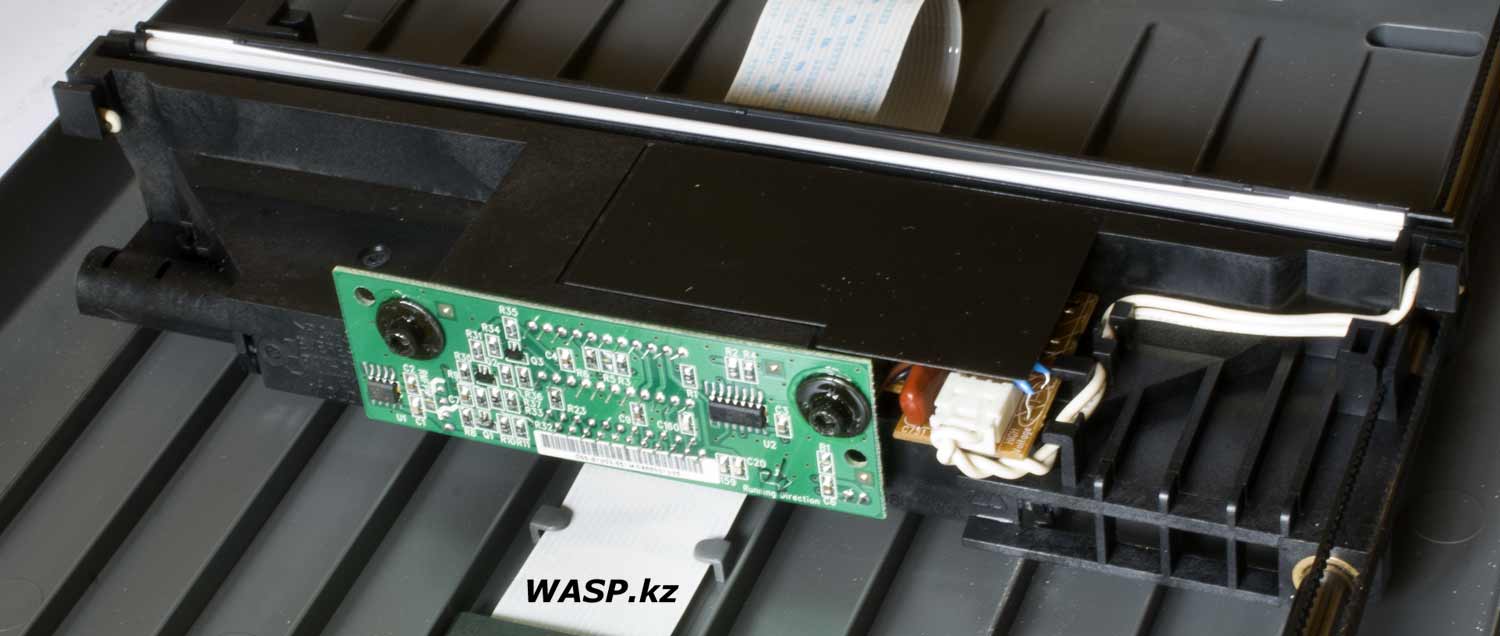
Конечно, полная разборка и сложнее и увеличение риска вообще уничтожить устройство... Например, когда я проводил чистку сканера BenQ S2W 4300U, то не прибегал к полной разборке... сделал профилактическую очистку, собрал, проверил - все работает ОК, но... BenQ S2W 4300U разбирать и собирать очень легко. Данный же сканер в этом плане намного сложнее.
Тем не менее, я не рекомендовал бы сразу же проводить полную разборку, особенно если у вас нет или мало опыта очистки оптики... Сперва мы ватной палочкой со спиртом протираем лампу подсветки. Затем сухой ватной палочкой лезем в щель и стараемся аккуратно прочистить зеркало внутри... Нельзя оставлять ворсинок от ваты внутри каретки. Смотрим, много ли на ватке грязи... если много, то вероятно разбирать каретку вам все же придется.
В моем случае, этого не понадобилось - поверхностная очистка помогла, сканер не стал полосить, и вообще, стал работать хорошо, много мелких пятнышек и пылинок раньше мешали, и приходилось в редакторе много исправлять этих недостатков. Теперь этого почти нет.
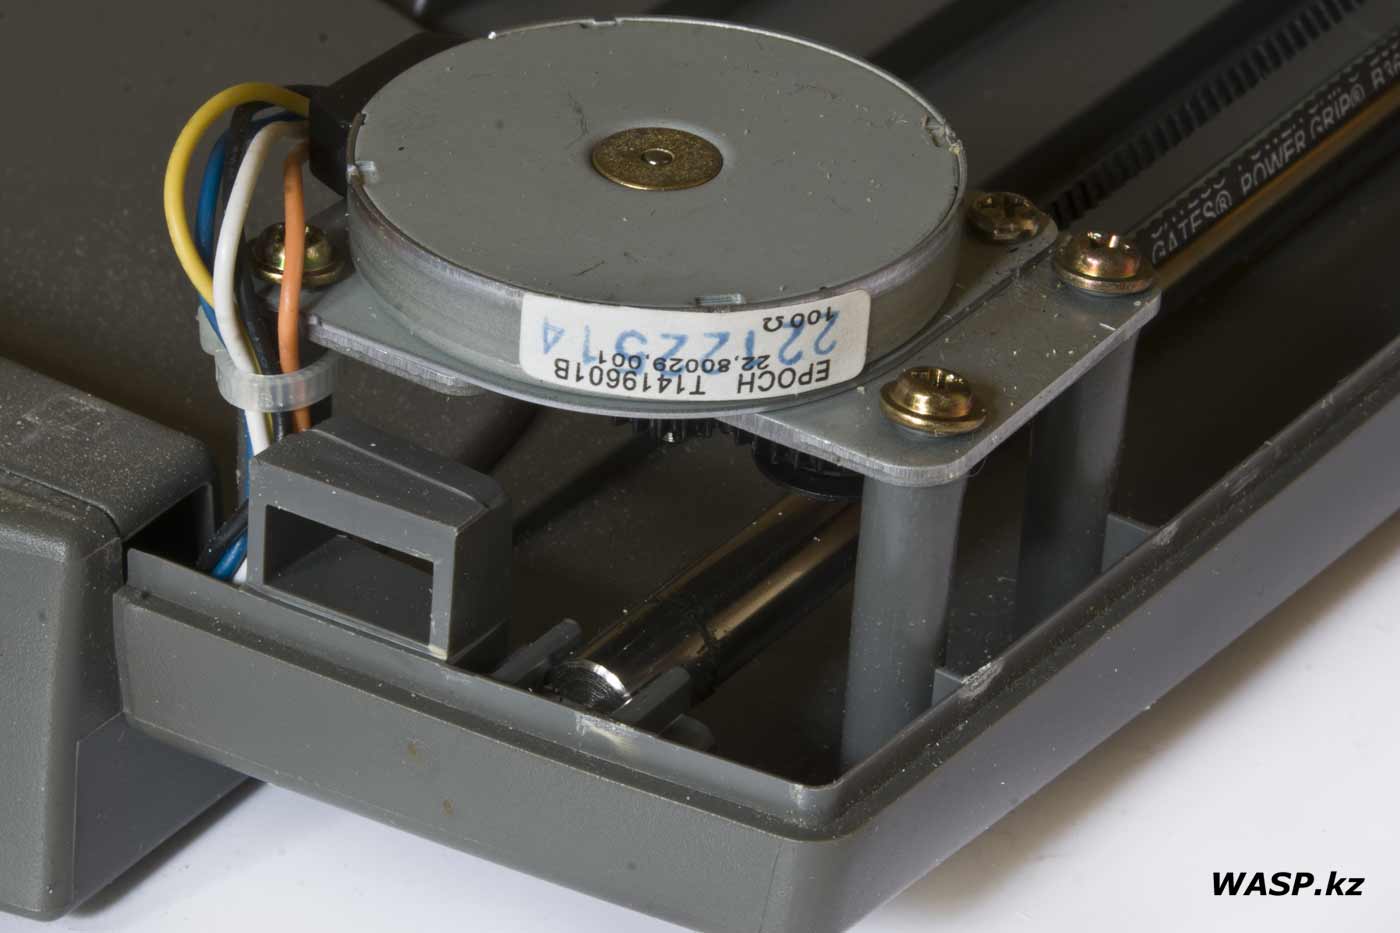
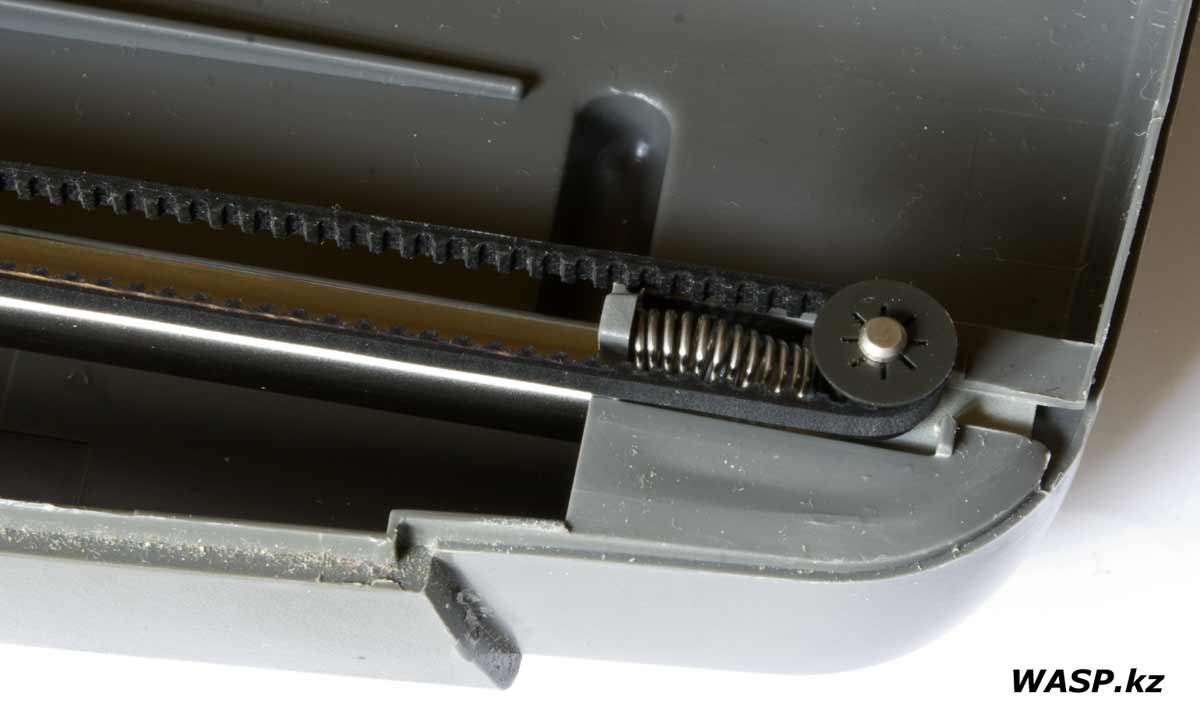
Еще момент, который иной раз требует ремонта: зубчатый ремень, шаговый электродвигатель и редуктор... Зубчатый ремень имеет маркировку - Gates Power Grip R363MXI 24... Шаговый двигатель - EPOCH T1419601B 22,80029,001...
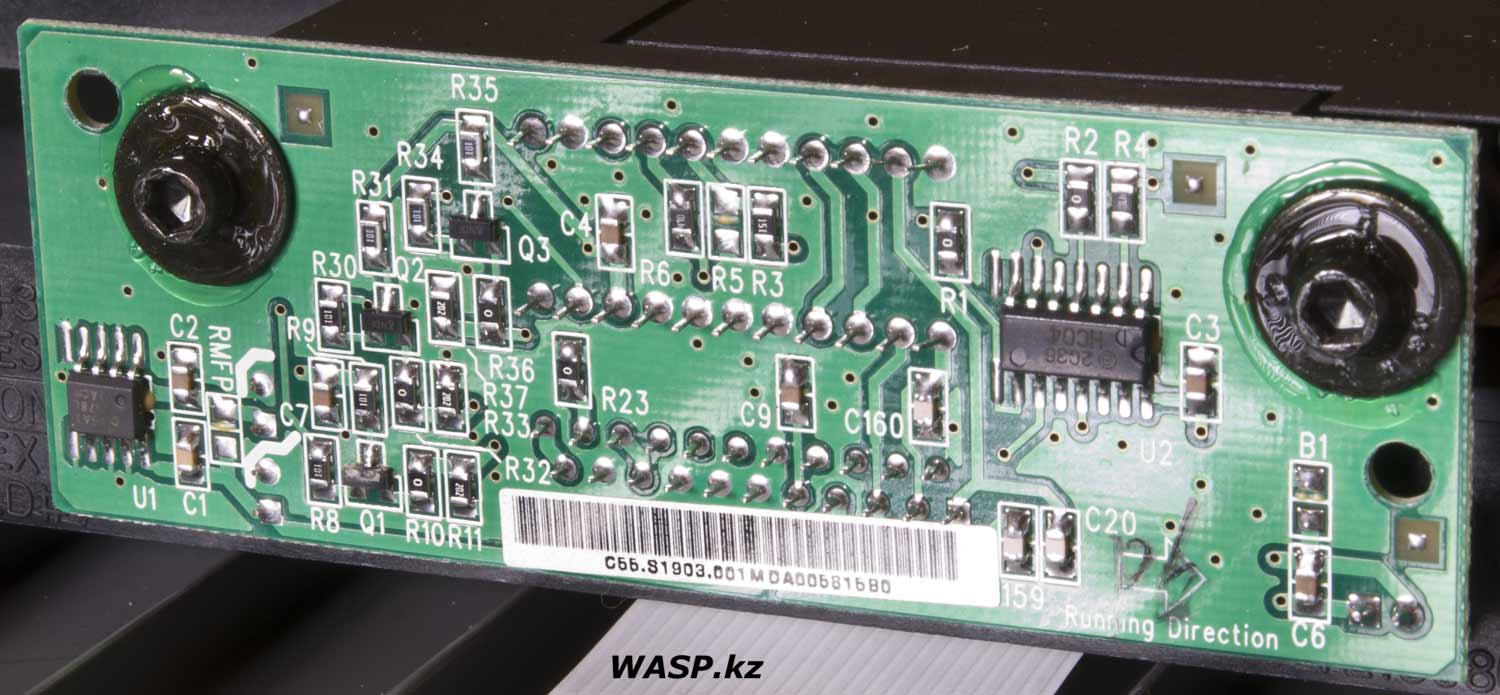
Вот эта плата, на которой и распаяна CCD-матрица. Обратите внимение на мощные винты, залитыке к тому же клеем для фиксации... Это неспроста. Эсли вы открутите эти винты, например, для чистки матрицы... назад с такой же точностью вы вряд ли все установите...
На этом заканчиваю. Если будут какие-нибудь новые проблемы и методы их решения - статью обязательно дополню!
Михаил Дмитриенко
Алматы
2020 г.
Epson Perfection 660 - disassembling and cleaning the scanner
In general, I had this material prepared a long time ago, but my hands did not reach to put everything into an article. And here at the Forum we raised a question about this scanner, so I'll write as it is - how it goes.
At me this scanner also sometimes began to "strip" ... But then it stopped by itself, I do not know for what reason. Until, finally, the band appeared and did not disappear ... I had to disassemble. I had no information about disassembling this scanner, and therefore I disassembled it "by touch" - I did not succeed right away and was not without losses ...
+ Click on the photo to enlarge!
As it is written in the comments, disassembly should start from the front panel - "muzzles" ... And it should start from the bottom side. There are two protruding strips on the panel, they sit in the same recesses on the body. These strips are small and relatively easy to release. The round protrusion - the lock of the movable head (carriage), gets in the way, but gently prying with a flat metal spatula, we go around it too. The main thing is not to rush ...
Above, like two teeth, two latches, and they flew off from me. The point was apparently that the plastic became fragile over time ... However, the breakage of these teeth does not threaten anything terrible.
- This is the first moment, as you can see, strips of white film are glued into this panel, with black lines, rectangles and so on - these are samples for self-testing. At the very beginning, after turning on the scanner, the carriage makes 2-3 short movements precisely by interacting with this element. And it must be clean. Often it is because of a stain of dirt that the scanner cannot correctly calibrate the matrix, and streaks are obtained ...
We divide the scanner body into two halves - in the front side there are two latches, look at the photo, how the latches are arranged! We unfasten the front part and raise it, at the same time we move it back. Of course, to the mothers of developers, and rightly so!
So we disassembled the Epson Perfection 660 scanner - now you need to clean everything inside. There is a lot of dust inside ... everywhere there is some kind of plaque ... and on the working glass from the inside! I sprayed Mister Muscle and wiped it off instantly. We try not to miss anything. Now we clean the bottom of the case. We blow it out, with a brush and so on ...
There is one important point here: will you decide on a complete cleaning, with the most complete disassembly, or will you limit yourself to cleaning only the available elements?
Of course, complete disassembly is more difficult and an increase in the risk of destroying the device altogether ... For example, when I cleaned the BenQ S2W 4300U scanner, I did not resort to complete disassembly ... I did a preventive cleaning, assembled, checked - everything works OK, but .. The BenQ S2W 4300U is very easy to disassemble and assemble. This scanner is much more complicated in this regard.
Nevertheless, I would not recommend immediately carrying out a complete disassembly, especially if you have little or no experience in cleaning optics ... First, we wipe the backlight with a cotton swab with alcohol. Then we climb into the slot with a dry cotton swab and try to gently clean the inside of the mirror ... You can't leave the cotton wool inside the carriage. Let's see if there is a lot of dirt on the fleece ... if there is a lot, then you probably still have to disassemble the carriage.
In my case, this was not needed - surface cleaning helped, the scanner did not strip, and in general, it began to work well, many small specks and dust particles interfered with, and I had to fix a lot of these shortcomings in the editor. Now this is almost gone.
Another point that sometimes requires repair: a toothed belt, a stepping motor and a gearbox ... The toothed belt is marked - Gates Power Grip R363MXI 24 ... Stepper motor - EPOCH T1419601B 22,80029,001 ...
This is the board on which the CCD matrix is soldered. Pay attention to the powerful screws, and the glue for fixing ... This is no accident. If you unscrew these screws, for example, to clean the matrix ... back with the same precision, you are unlikely to install everything ...
This concludes. If there are any new problems and methods of solving them, I will definitely add the article!
Mikhail Dmitrienko
Almaty
2020 |


October 03 2016 16:38:35
October 03 2016 19:22:53
May 19 2017 00:46:43
May 19 2017 19:33:12
December 31 2017 23:18:05
August 09 2018 21:02:33